

TABLE OF CONTENTS
2. Join Airmeet with your Invitation
Quick Tip:-

- Do not share your private invitation link with other participants.

- The private link is only for you. Please do not share it with anyone as it will allow others to access your event profile.
1. Overview
Are you speaking at an Airmeet event? Awesome, we are delighted to welcome you on board. Now it’s time to prep yourself for your online event.
Walkthrough Video guide
Note: Videos will be updated soon.
We are here to make your Airmeet experience seamless, this guide will help you make the most of this experience.
Tip: Speakers can also join an event from their iPad using the Airmeet Ipad Application exclusively for speakers.
2. Join Airmeet with your Invitation
Step 1: You will have an invitation email to join the event sent by your Event organizer. Please use the enclosed link or CTA "enter event" to join. You will directly enter Airmeet with no signing-in required.
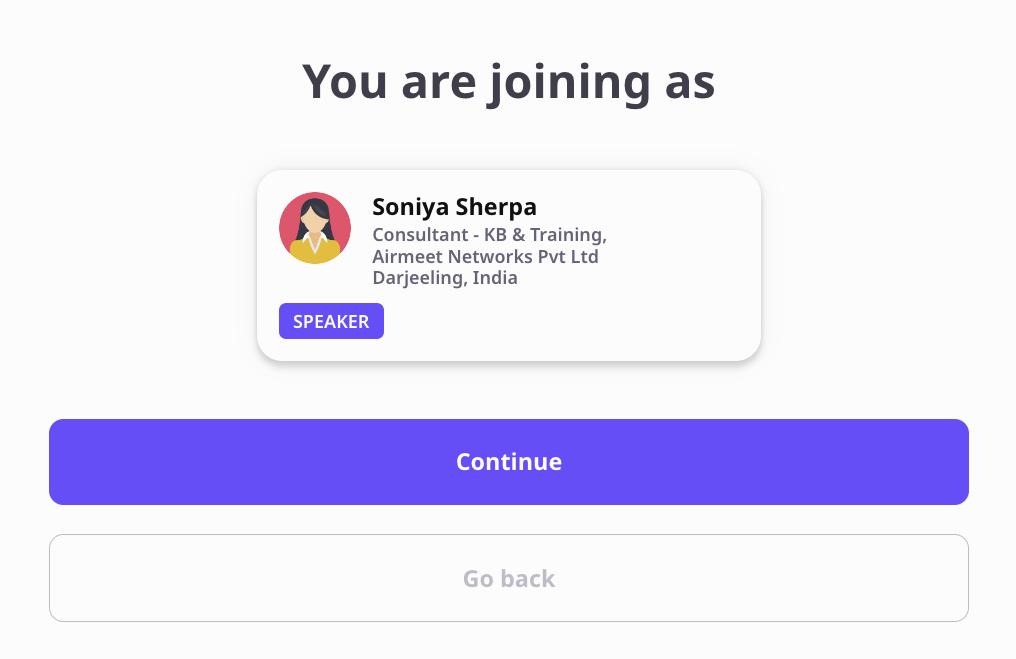
This link is unique to you as a speaker, and only you should log in using this link.
Note: If you choose to share this link with anyone, it will appear on the Airmeet with your name and details and you won't be able to join with the same link.Once you enter the event, you will be asked to give access to "Camera and Mic". Click on Enable camera & mic.
Step 2: Enter Airmeet
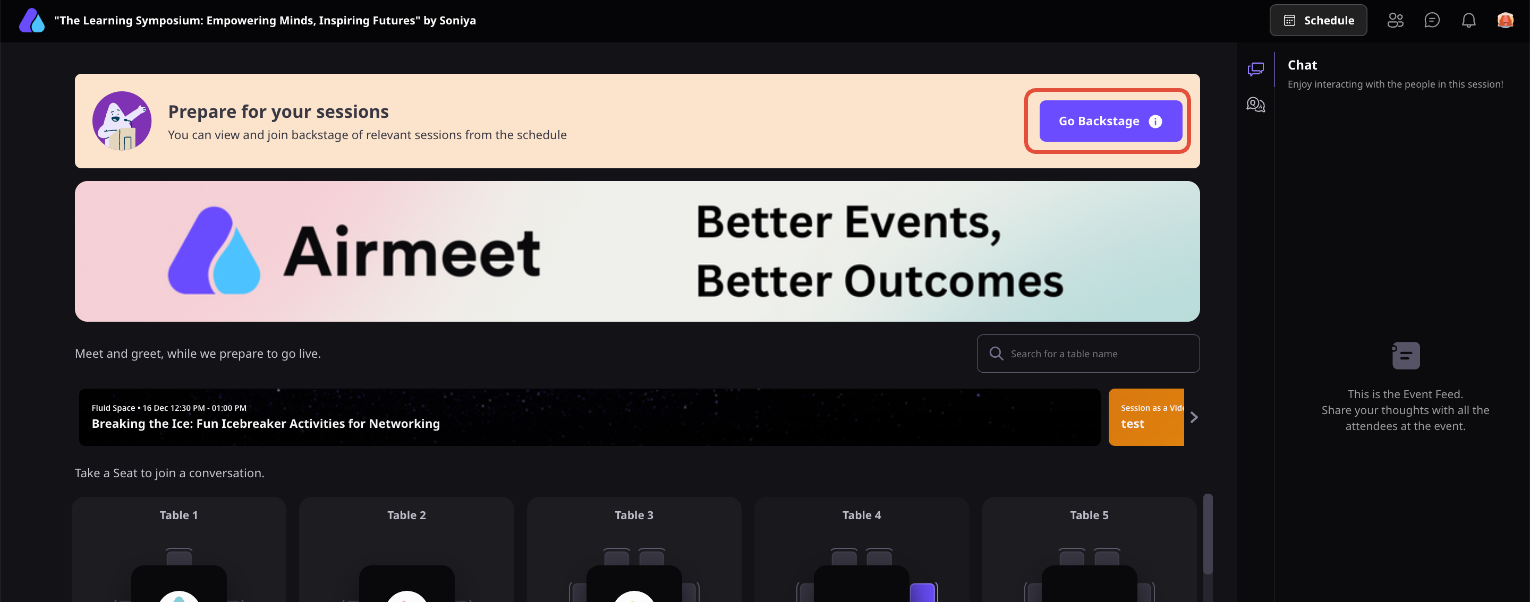
After entering the Airmeet, you will first encounter the ‘Social Lounge’ to interact and network with the attendees and the host. You will also have an opportunity to go to the social lounge during breaks as well as after the session.

Update Profile:
Update your profile while you enter the event and add your interest, social handles & your bio.
Read about: How to edit or update your profile on an Airmeet event?
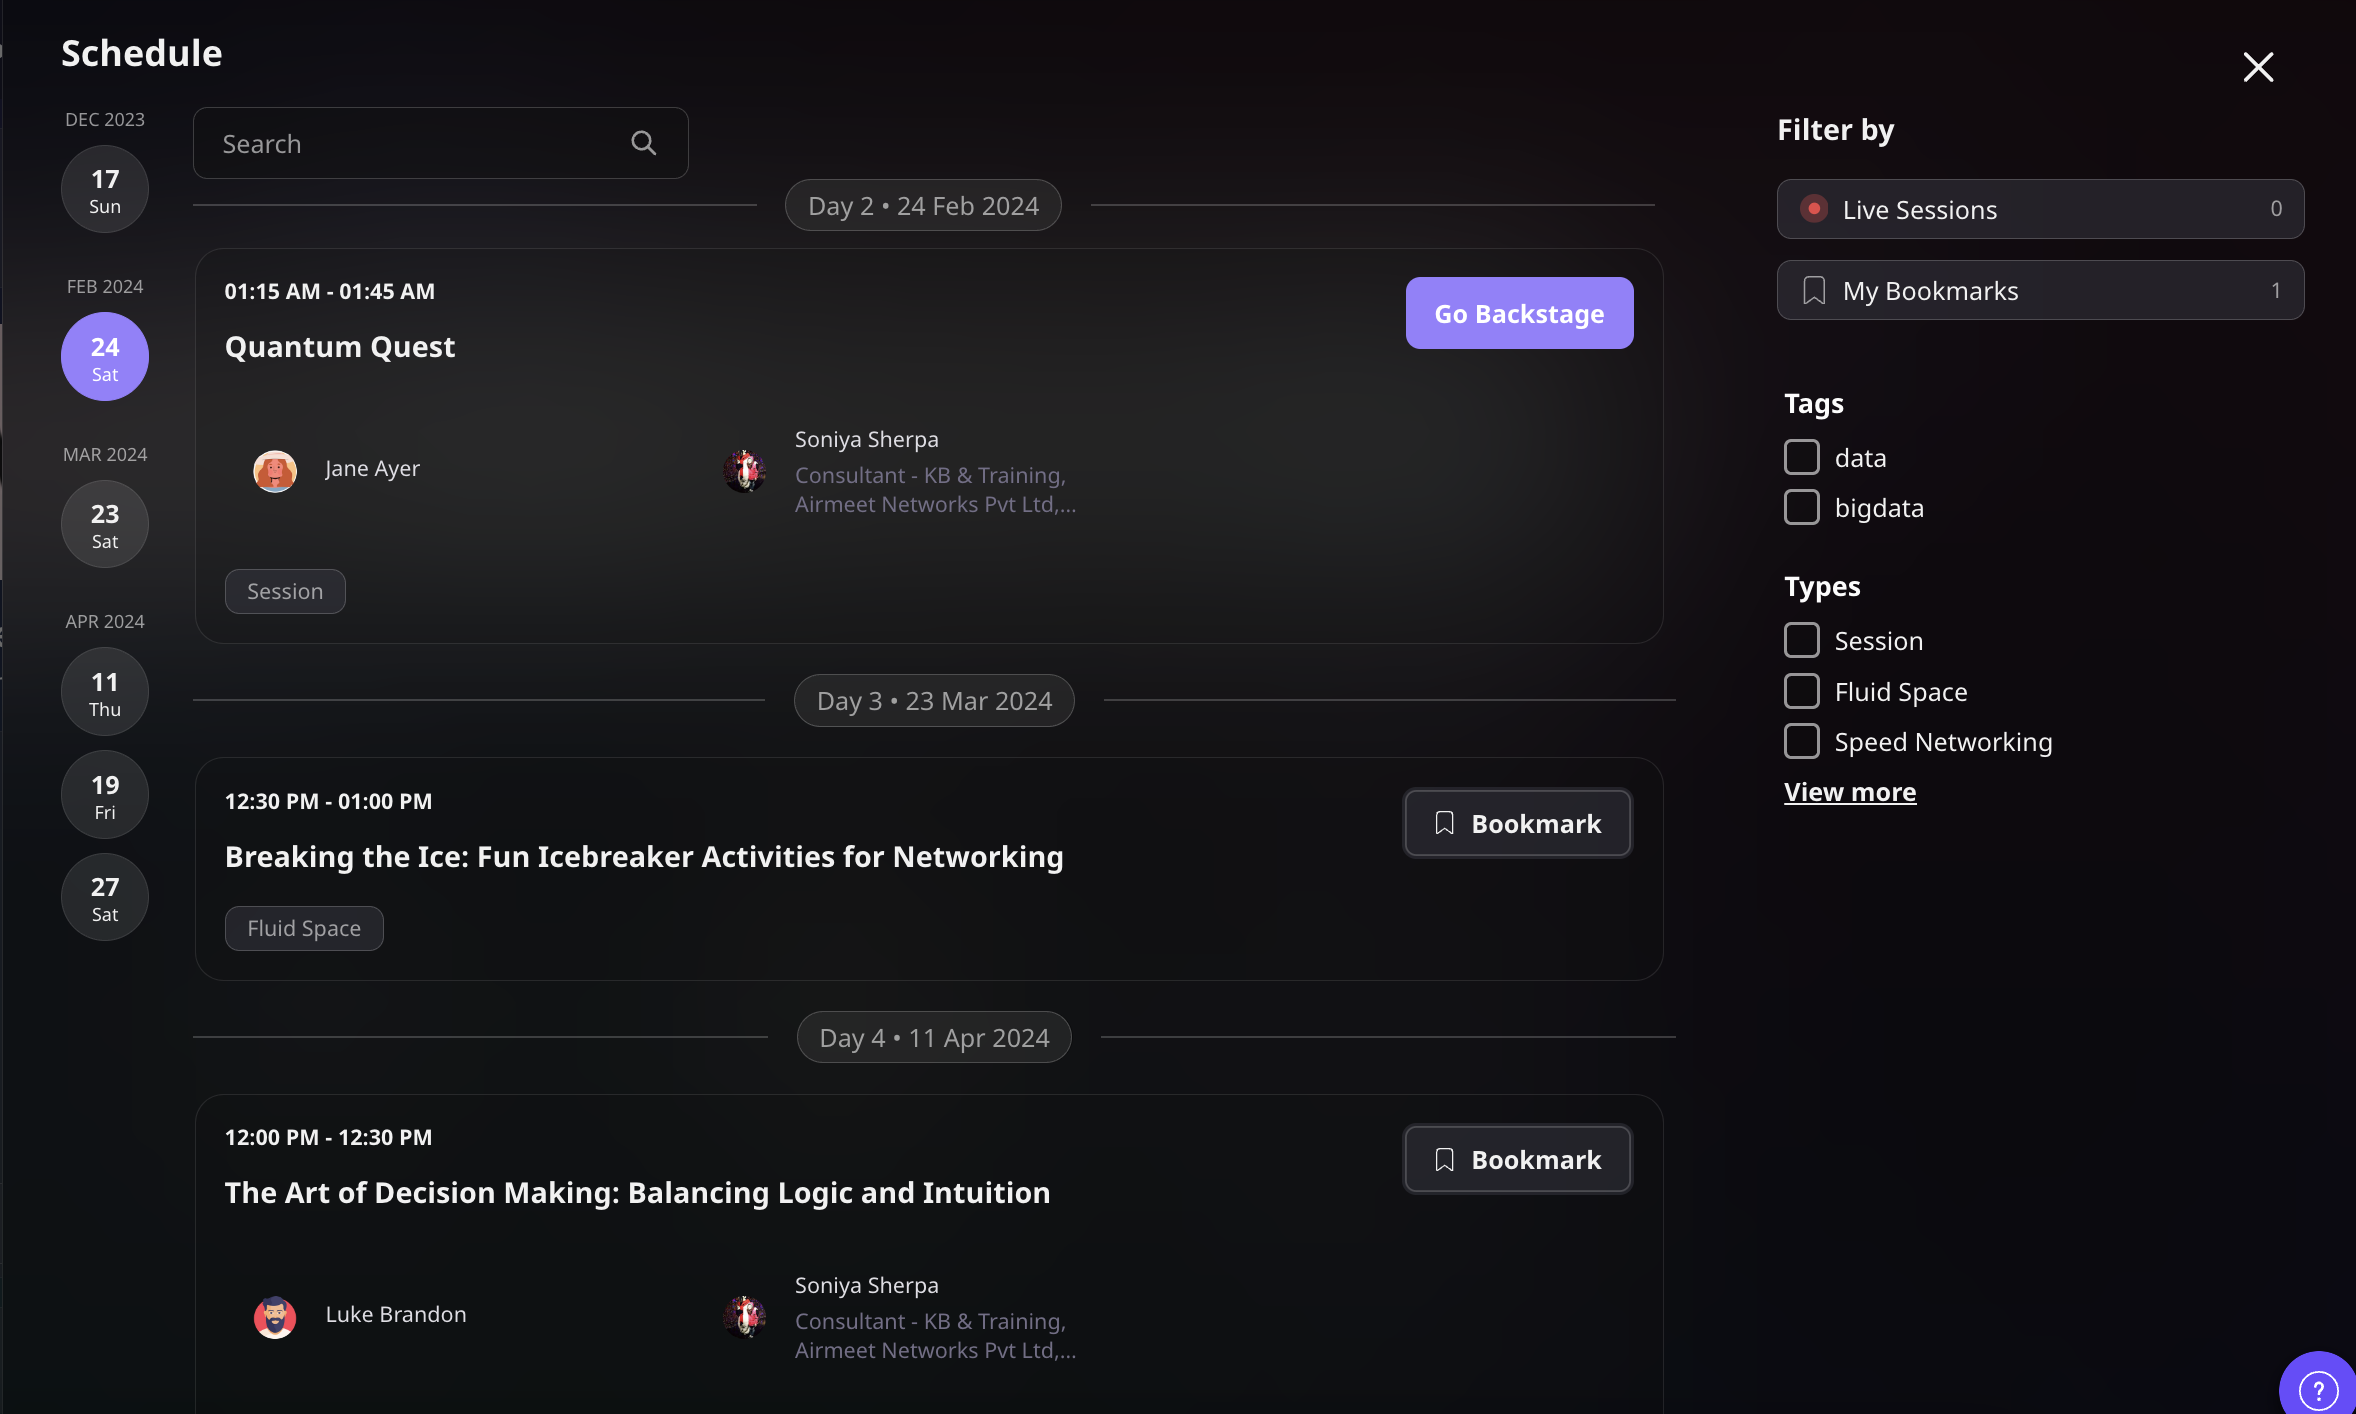
Step 3: Schedule
Click on the "Schedule" at the top of the social lounge page to view the agenda of the event.

On the Schedule, you will see the following information:
Date and time of all the sessions
Sessions and their brief descriptions
Speaker and their details about them.
Filters (live session, bookmark, tags, types, etc.)
3. Backstage
Step 4: Click the “Go Backstage” CTA to get ready for your session or interact with the host and other speakers, or get to know them before you go live.
Note: You as a (speaker) will be able to join backstage as it is common for all the speakers however once your session is live you will be taken to the live stage. You can also join the stage if the host invites you on stage during the live event.
On Backstage, you can test your audio, and video settings by clicking on the "Audio & Video Settings" icon to avoid last-minute surprises.

Once everything is in order, the host can start the session. A countdown of 10 seconds will indicate that the session is about to begin.

4. Live Session
Once the session has begun, you can participate and present your content. The Speaker is always visible to all event participants unless you choose to switch off your camera. (When you join, by default your video will be turned off)

4.1 Session Interaction
Chat: Interact with your participants on chat and reply to them on the same tab.

Q&A: The ‘Q&A’ icon on the right-hand side of your screen lists questions asked by the attendees.

Session Participants: It shows the participants of this particular session. Active participants are indicated by a green button.

Polls: As a speaker, you will be able to vote to the existing polls and also, create and publish polls for the attendees.

Raise Hand: The host can moderate and accept or dismiss the request. If accepted, the attendee shares the stage with the speakers for the interaction.

Resources: Speakers together with hosts, can upload the resources such as images, videos, audio, gifs, etc. required for the session. It is also possible to share the link(s) of the resource/media repository in this section.

4.2 Take a break
Longer sessions call for breaks in between.
The host moderates the event and can execute breaks during the session. You can go to the ‘Social Lounge’ to interact with participants during the break.

5. Quick Tips:
Please have a stable and good internet connection.
A noise-free ambiance is conducive to smooth interaction.
It is recommended to use a laptop with a Chrome browser.
Restart the browser to avoid issues (if you face any) due to caching.
An external and good headset with a mic is recommended, though not mandatory.
If you have difficulty seeing other speakers’ or the host’s feed, please refresh the page or restart the browser and ensure that you close any other conferencing tools you may have used recently.
Was this article helpful?
That’s Great!
Thank you for your feedback
Sorry! We couldn't be helpful
Thank you for your feedback
Feedback sent
We appreciate your effort and will try to fix the article