Following are the steps for uploading a backdrop and applying the same on the live session.
Uploading Backdrop (Pre-Event)
1.2. Design guidelines
Create backdrops according to the specified design guidelines:
Optimize your backdrop design for the right dimensions: 1920px wide and 1080px tall, you can put all your branding logo at the top area of backdrop like sponsors' logo, branding elements, etc., as per your convenience.
If your uploaded image is smaller than these dimensions, Airmeet will stretch it to cover the stage -- making it look blurry.
Dimensions: 1920px X 1080px (Keeping Aspect Ratio 16:9)
Maximum file size 10 MB
Format: JPEG, JPG, PNG
2. Uploading Stage Backdrop
Step 1. Go to the "Events dashboard" and click on the "Branding Tab."
Step 2. Select the "Stage Backdrop" tab from the left-hand side.
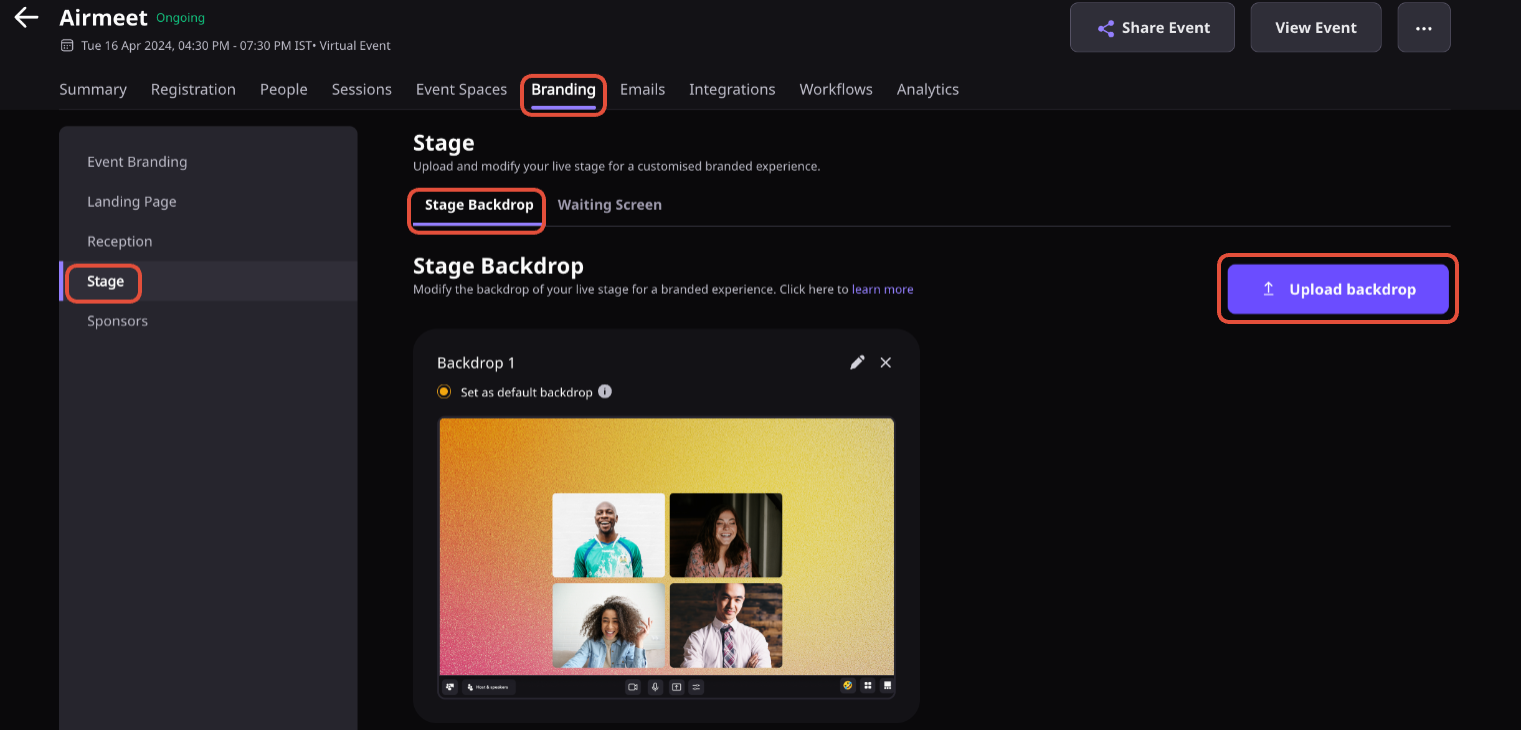
Step 3. Click the the Upload backdrop or Drag and Drop the image in designated area from your local computer.
The recommended file format should be as follows:
Dimensions: 1920px X 1080px (Keeping Aspect Ratio 16:9)
Maximum file size 10 MB
Format: JPEG,JPG,PNG
2.1. Adjust Stage backdrop & Preview
Step 4. Once the stage backdrop is uploaded, preview the backdrop and adjust the video grid according to your logo and covered area.
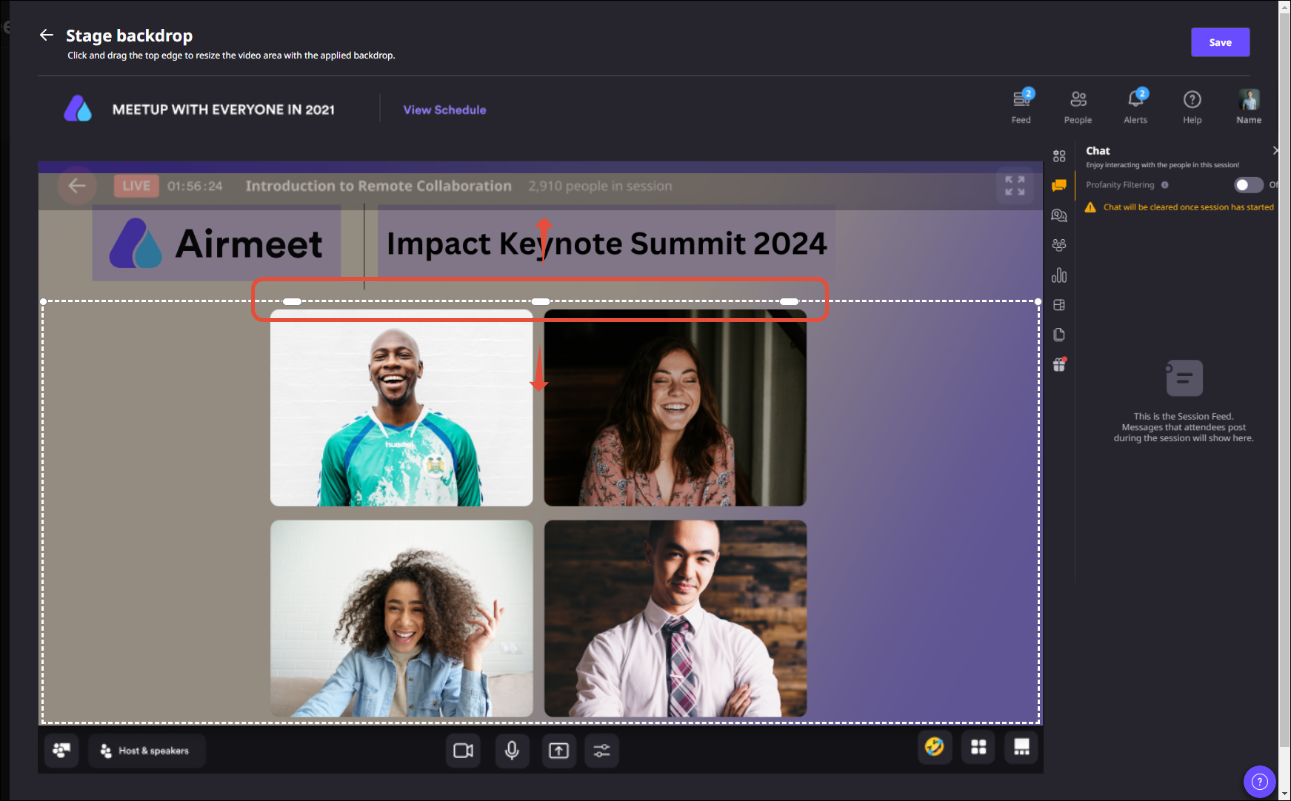
Note: You can only adjust the stage backdrop from height (top to bottom) and NOT width (right to left)
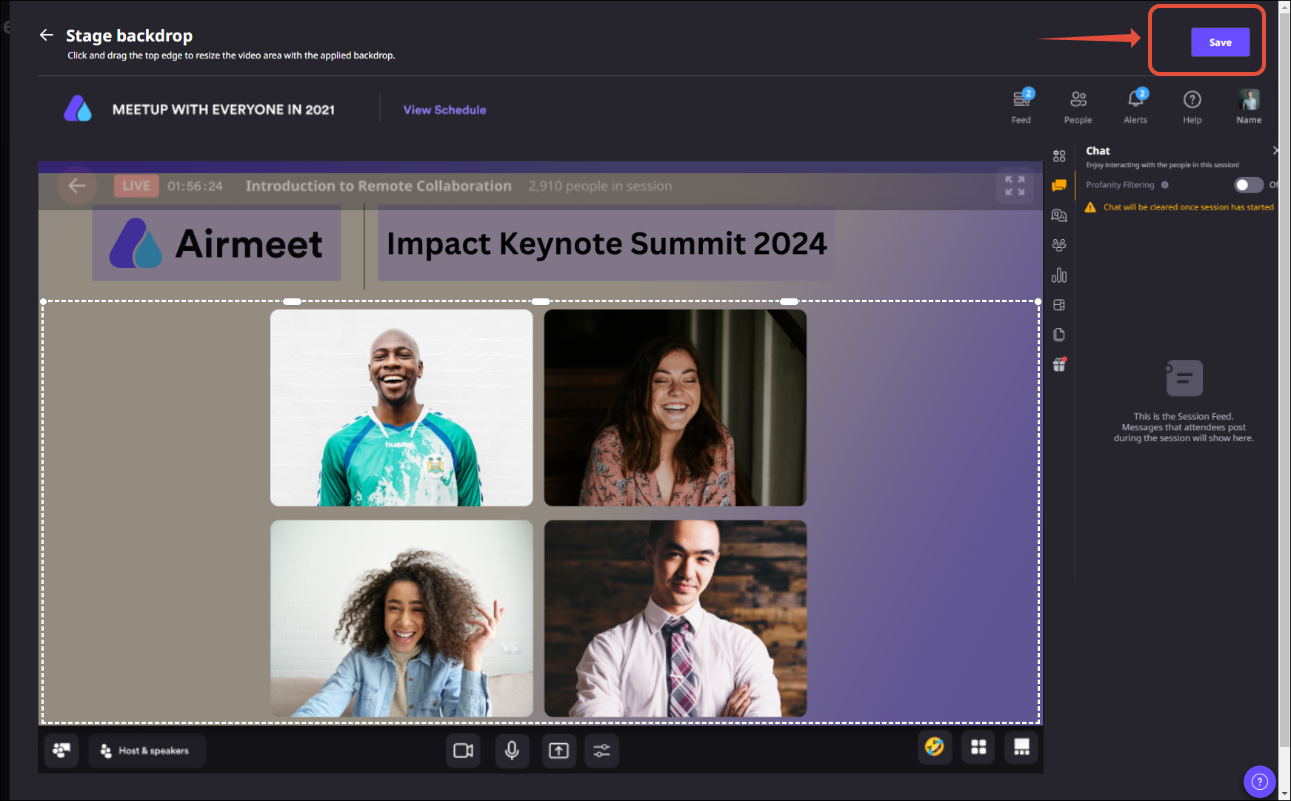
Step 5: Preview the backdrop image to see how it will look during the event. If the preview looks good, click on "Save".
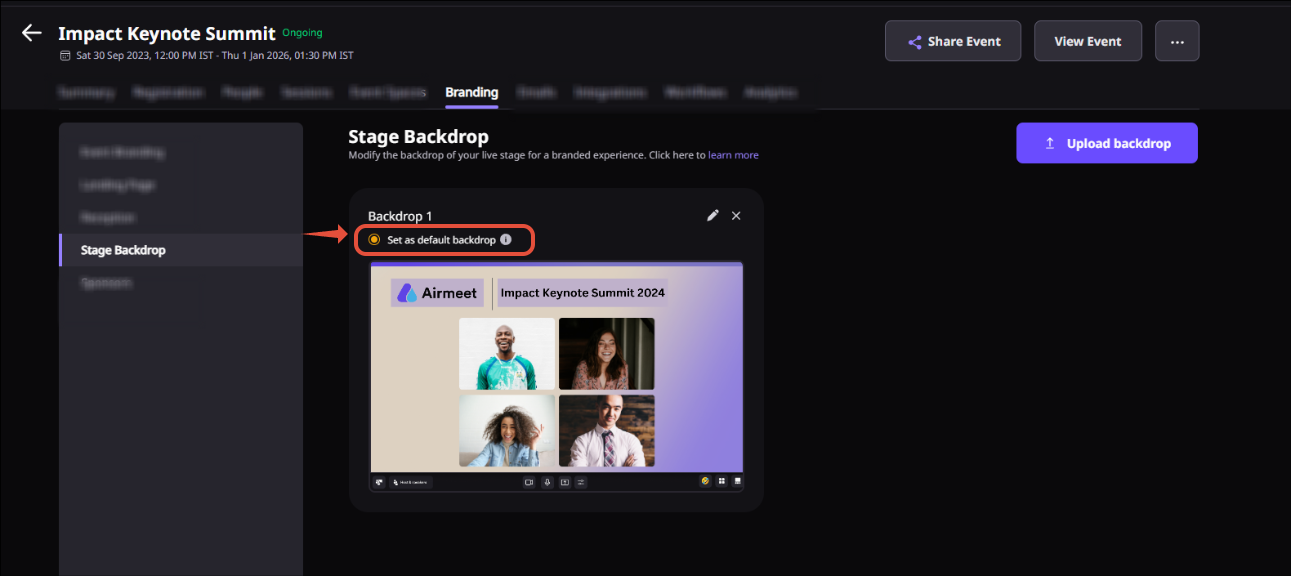
Step 5. The backdrop will be added to the event. Choose the "Set as the default backdrop" option if you want it to be applied by default on all sessions.
3. Apply stage backdrop on the Live Stage
Note: Only the session host/co-host can change the stage backdrop.
The stage backdrop can be changed from both the backstage and the live stage. Let's understand how to do the same.
Step 1. Go to the right-hand side of your session backstage or stage and click on the Manage button.
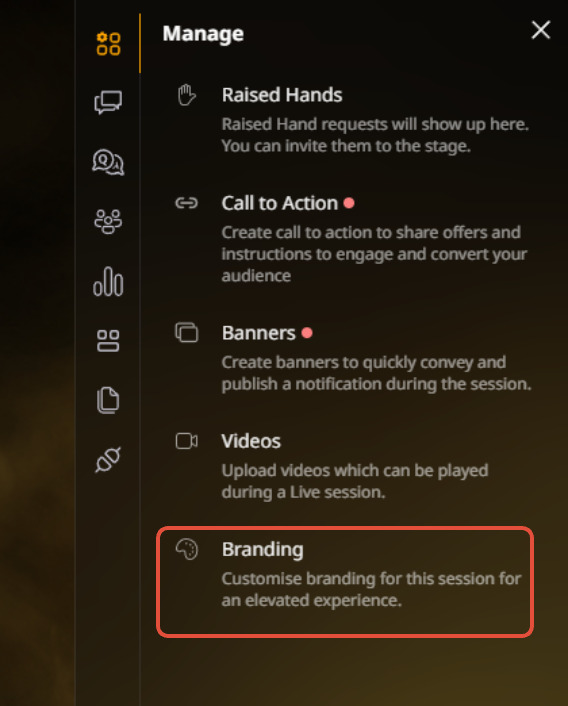
Step 2: Under the branding section, select the image file from the pop-up that opens. This contains the list of all backdrops that were uploaded from the dashboard. Click on the Apply.
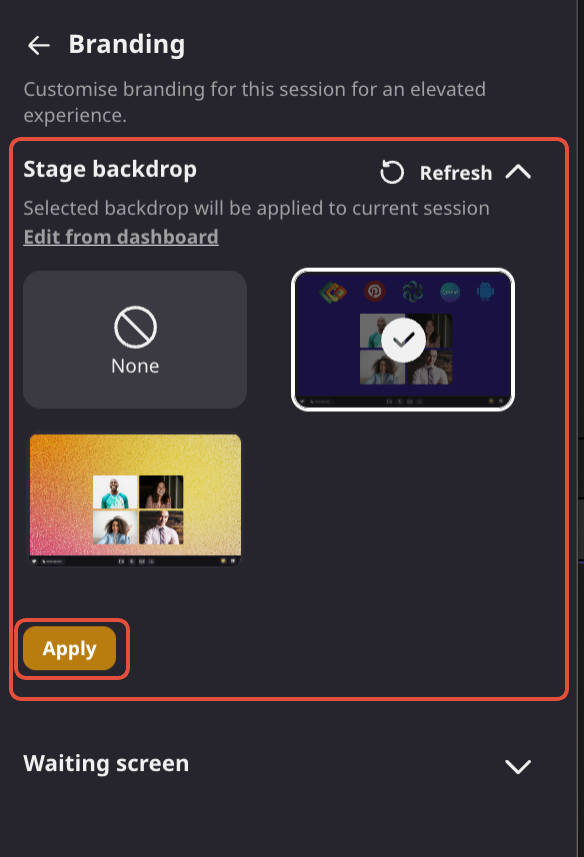
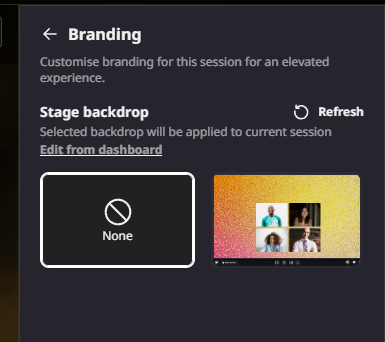
Step 3. If you want to remove the backdrop, choose the "None" option, which removes the backdrop and shows the output without the backdrop.
4. Points to keep in mind
The session recording will have a backdrop post-processing.
While using the stage backdrop, the video grid (of speakers on stage) won't get a 16:9 aspect ratio as it auto-compresses the ratio to 4:3.
Only the session host or co-host can change or remove the backdrop from backstage.
The session host or co-host can change the backdrop during ongoing sessions.
A stage backdrop can be applied for an RTMP-based session (Recommended layout: solid color or basic non-text design)
Need more help? Contact support@airmeet.com or visit our Customer Support Lounge.

