As an organizer, you can set up 3 forms of stream key, whereas the URL remains the same throughout the platform.
2.1. Event level key
Event-level stream key can help you have 1 single key for all your "Stream into Airmeet" based sessions. Once streaming is started, you can view stream input in all the sessions created under the "Stream into Airmeet" type of session.
All the non-parallel sessions have the Event-level stream key by default and can be copied either from session details or from the Session settings tab.
a. How to enable event-level key
Steps as follows:
Go to the Event dashboard > Click on the 'Sessions' tab > Go to "Session List" > "Add schedule item" > select "Stream into Airmeet" type > Create session.
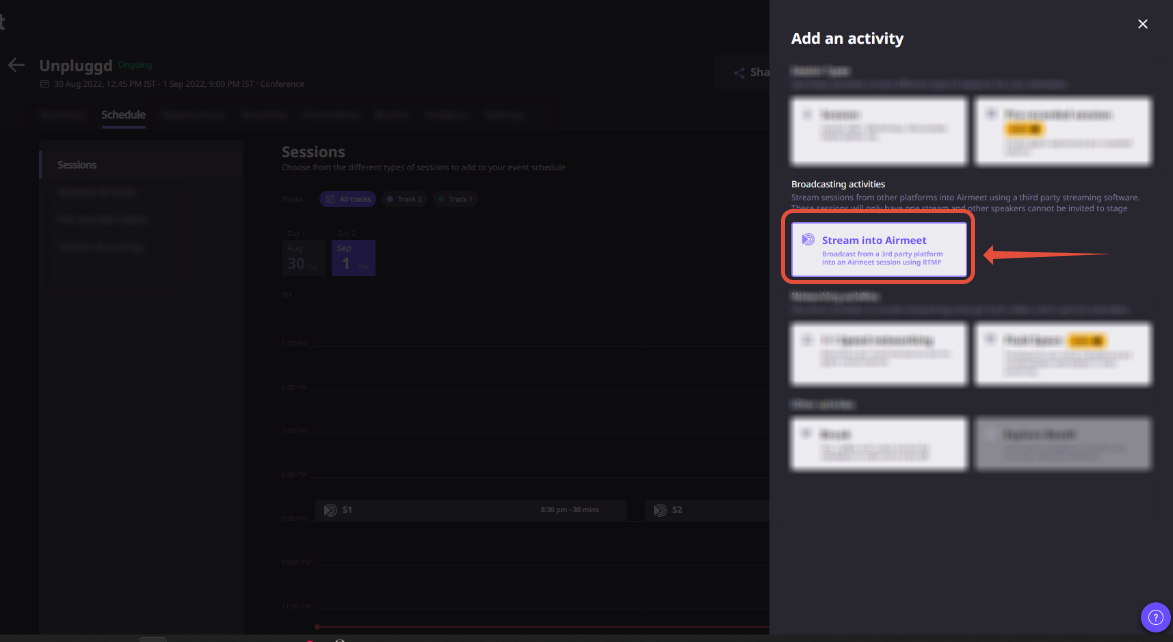
b. How to view event-level key
Steps as follows:
Go to the Event dashboard > Click on the 'Sessions' tab > Go to "Sessions Settings" > "Stream into Airmeet" > "View Stream Keys" > Copy Stream Key and URL.

Note: The streaming output will be viewed all backstage in case the event level key is being used. Therefore, organizers need to ensure they start the particular day session only.
2.2. Session level key
You can create a parallel session and copy the stream key to stream in via a unique RTMP stream key for each session.
Go to the Event dashboard > Click on the 'Sessions' tab > Go to "Session List" > "Add schedule item" > select "Stream into Airmeet" type > + Generate Stream Key.
Now your session level is generated.
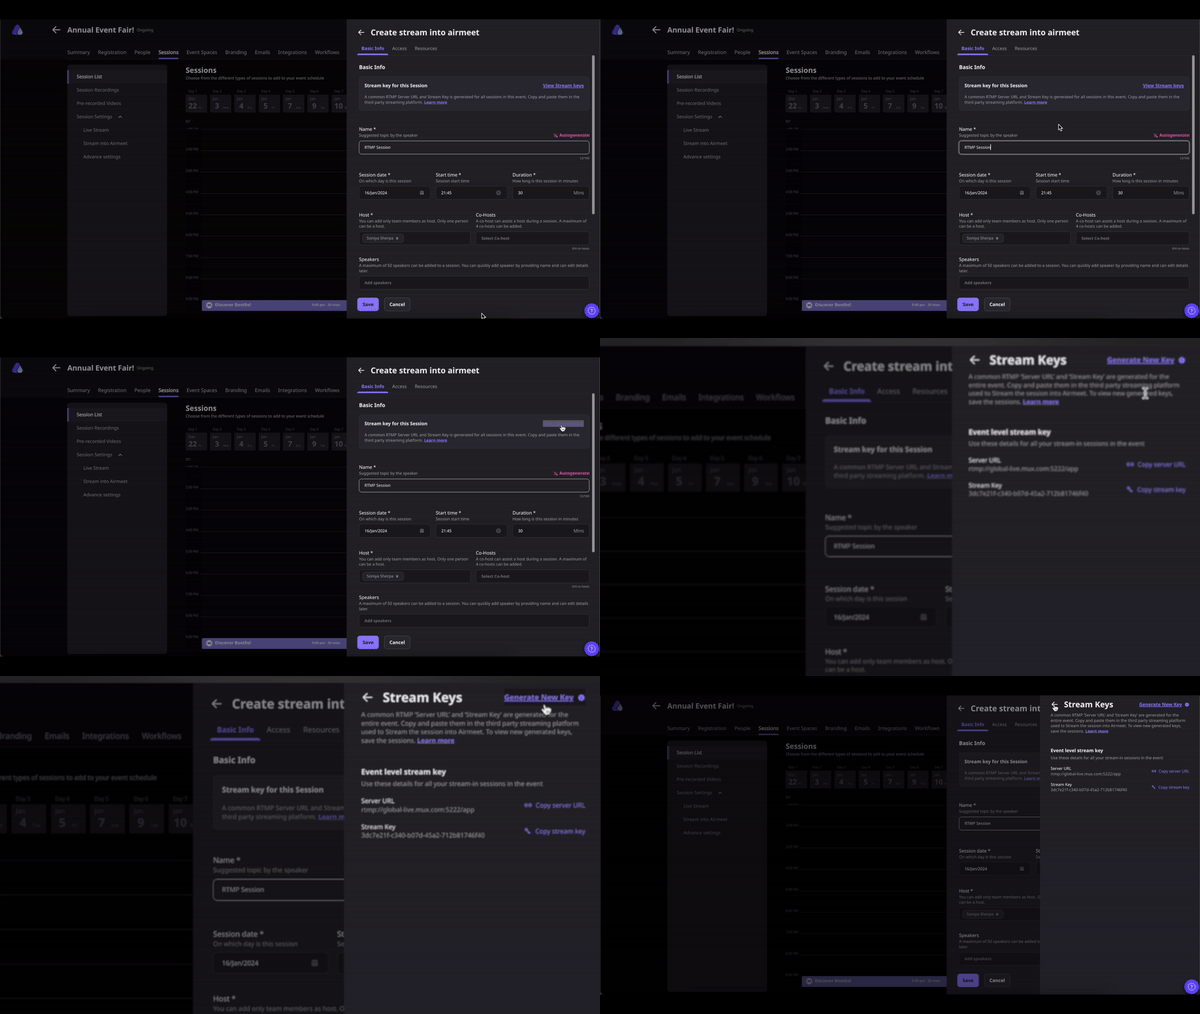
b. How to view session-level key
Steps as follows:
Go to the Event dashboard > Click on the 'Sessions' tab > Go to "Session Settings" > "Stream into Airmeet" > "View Stream Keys" > Copy Stream Key and URL.

2.3. Tracks level key
An organizer can create a parallel session and map them to different tracks (similar to a session playlist). Tracks are a curated group of sessions designed to help participants focus on a specific topic.
Map RTMP-based sessions (Stream into Airmeet) to a track and copy the stream key from the settings tab. All the sessions mapped to particular tracks will have a common stream URL which can be used and inserted into third-party broadcasting software.
Go to the Event dashboard > Click on the 'Sessions' tab > Go to "Session List" > "Add schedule item" > select "Stream into Airmeet" type > Create sessions and map it to a track.
Steps as follows:
Go to the Event dashboard > Click on the 'Sessions' tab > Go to "Stream Settings" > "Stream into Airmeet" > "View Stream Keys" > Copy Stream Key and URL.

3. Setup stream key & URL for your next session
,Add a new session, go to your event dashboard and click on the Session tab.
Step 1: Event dashboard > Sessions tab > Session List > +Add schedule item > Select session type > Choose Stream into Airmeet
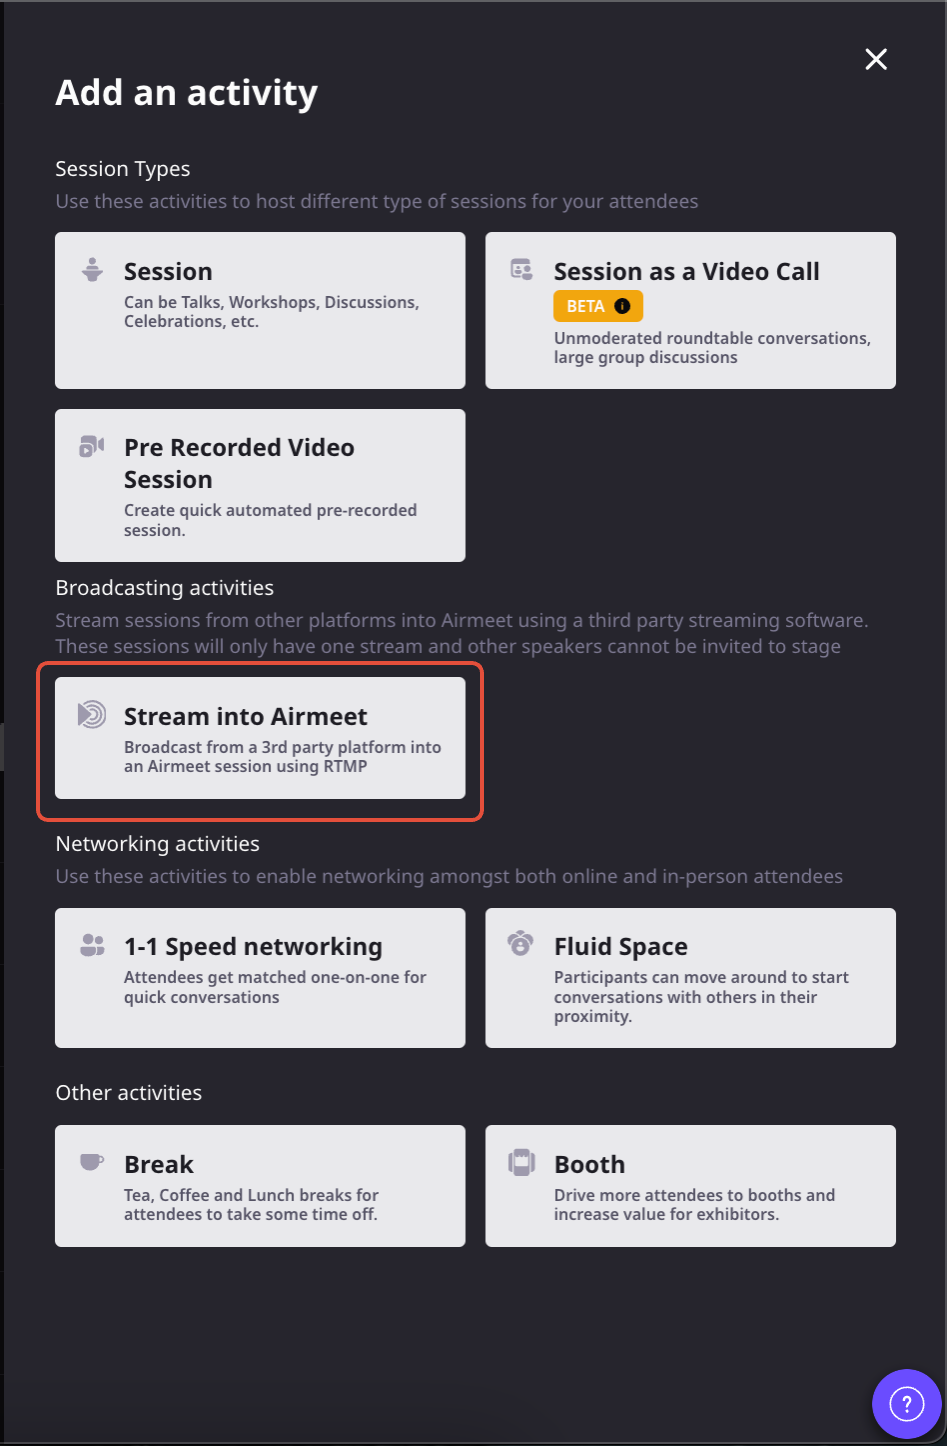
Step 2: Add Session components
Add the following details, which will be displayed on the events landing page & session tab during the event.
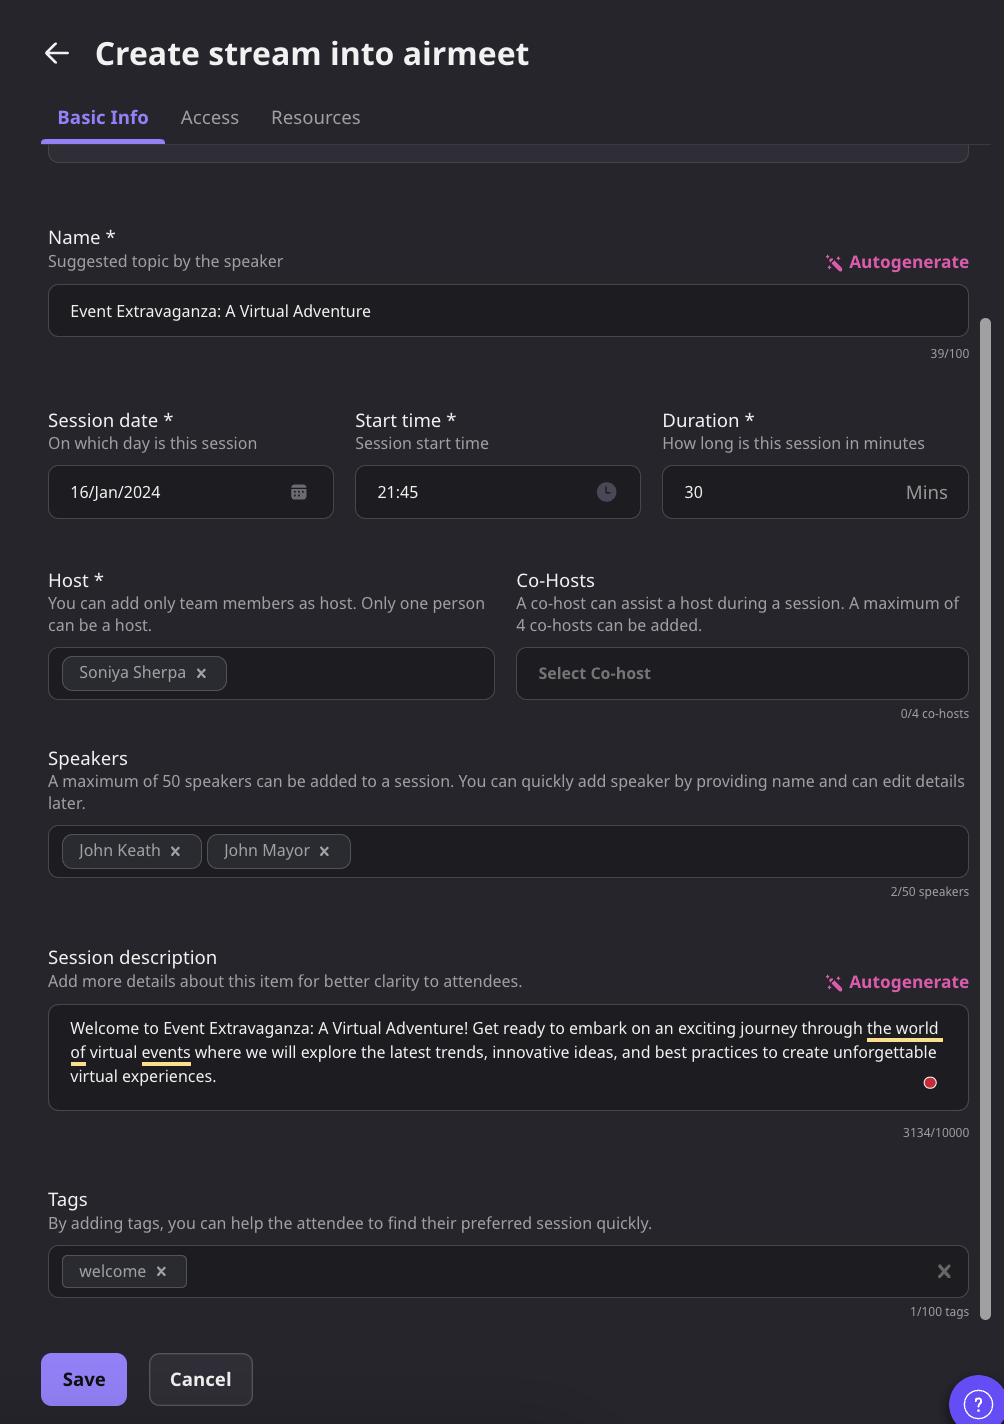
a) Session Name: Enter the session name, which should be clear and descriptive. Session details are visible to participants on the landing page agenda and the platform as well.b) Session Date: Enter the session date when the speakers and host would be going live.c) Session Time: Enter the session time for participants to know what time they need to attend. You can also add a custom time by double-clicking on the time section.d) Duration: Enter the duration of the session in minutes.e) Host: The session host is one point of contact for a live session and manages the stage controls. A host can only be a team member of the community.Help Article: How to add a community team member (Event Manager) in Airmeet?f) Cohost: The co-host feature allows you to have another user share event hosting responsibilities with the host. Having a co-host helps the host focus on moderating the event while the co-host handles the administrative aspect of the session.Help Article: What is a Co-host feature, and how to add a co-host to the Airmeet event?g) Session summary: Add a brief description of the session, which participants can read about and get a glimpse of.h) Speakers: Add up to 50 speakers for a particular session.Note: For an RTMP-based session, the speaker can't join backstage or on stage while the session is live. In contrast, as an organizer, you can add them as speakers and map them for an RTMP session to display their information on the event landing page and session agenda during the event.Help Article: How to add a speaker and map them to a session?i) Session tags: Tags are labels attached to a session or booth to identify or filter out the topic of interest.Note: You can add up to 100 tags cumulatively for an event.j) Control who can join: The organizers/host can control who can enter certain sessions in Airmeet events. Controlling access can be done based on either Ticketing tiers or the list of registrants/ list of attendees uploaded by the organizer using CSV file upload or can avail of both options.Help Article: Control who can access your event session (restrict session-based entry)
Step 3: Once the details are entered, click on the Save button.
Step 4: To receive the RTMP key & URL, click on the edit option and copy the stream key & URL. These will be copied into the broadcasting platform you will be using to send the RTMP feed.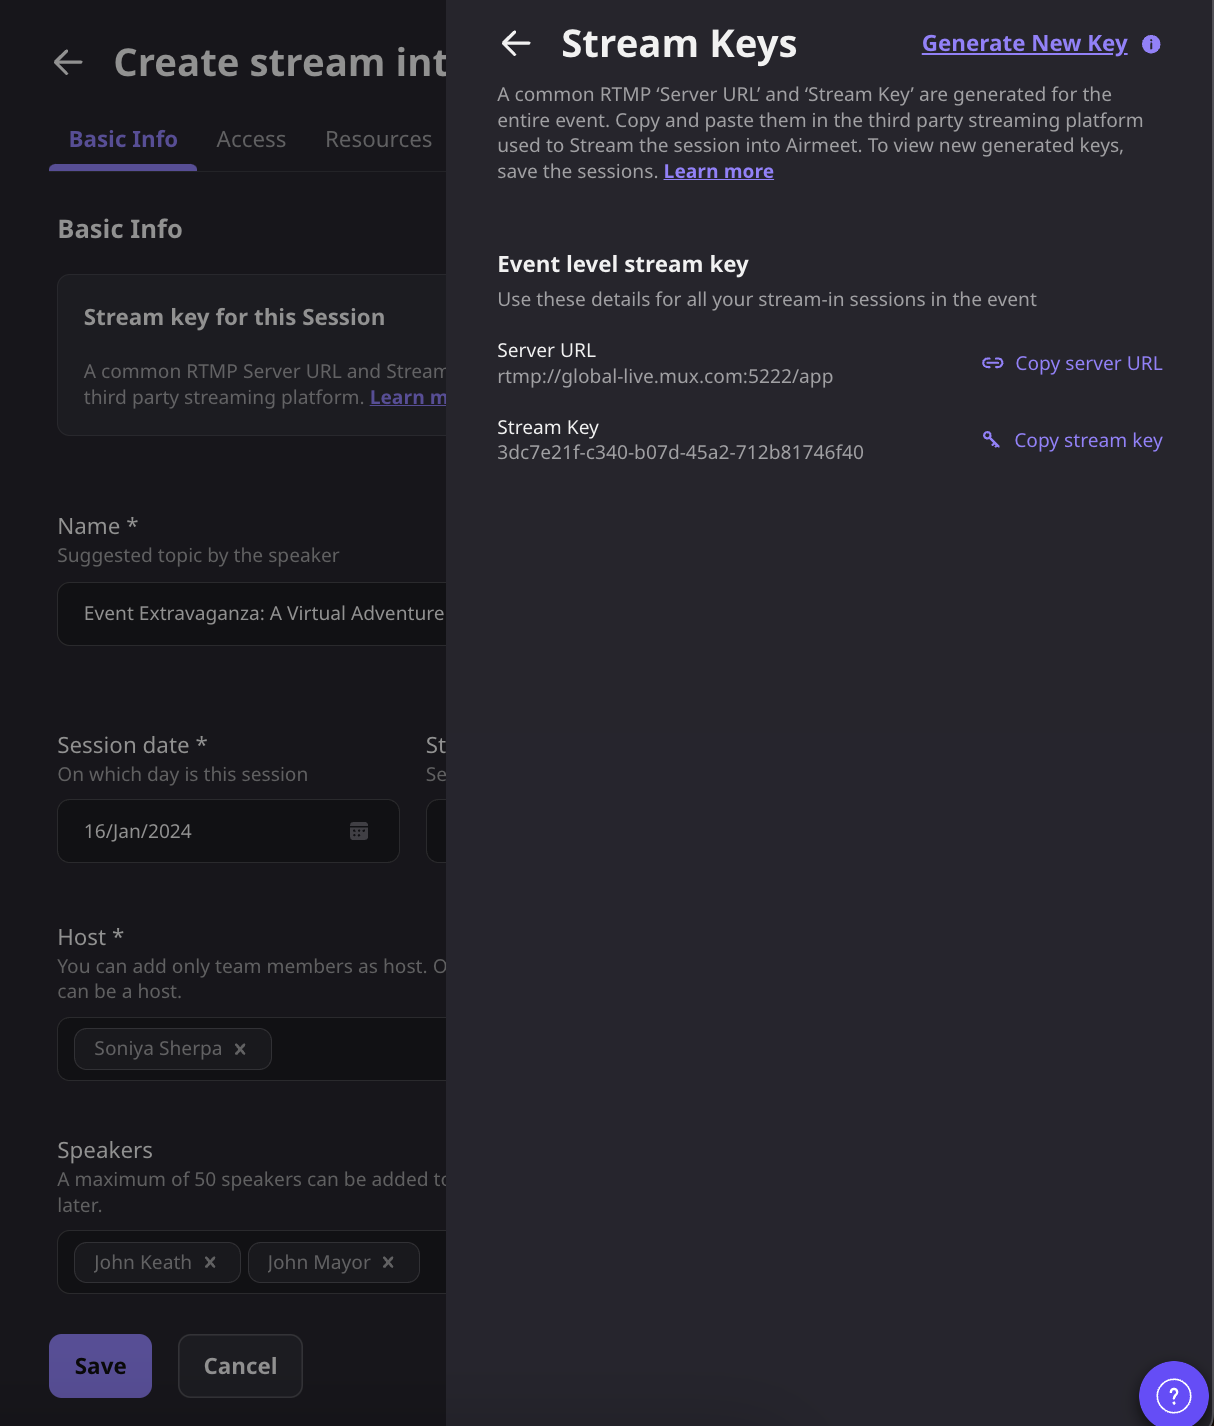
Note: RTMP Key & URL doesn't require any password to send a RTMP stream output.
5. Once the session is created, you will see the “Stream into Airmeet” label on the session card.
4. Going Live with the broadcast
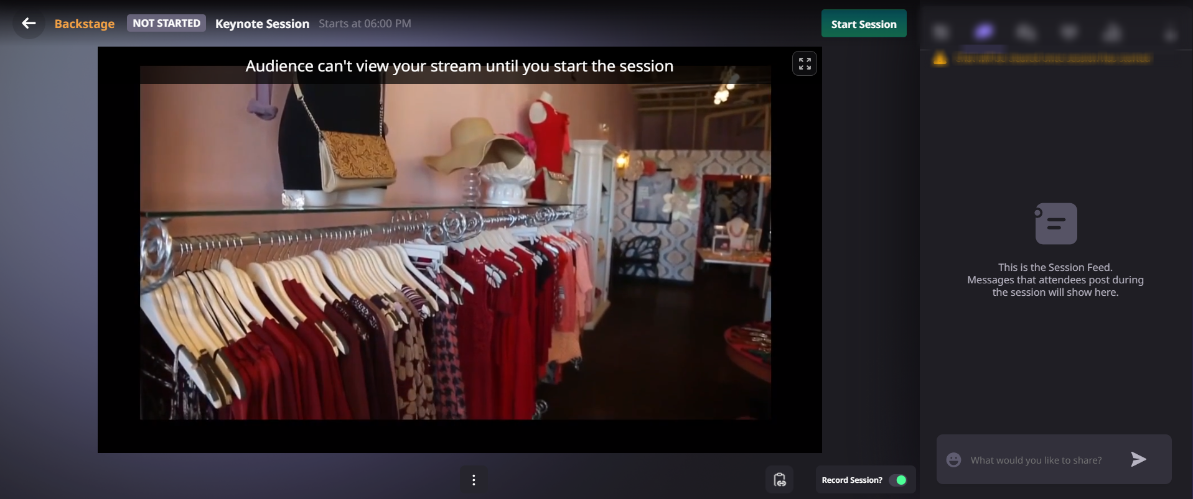
Step 1. For the broadcast to be visible to the attendees on Airmeet, the host will need to start the session backstage.
Step 2. When the host goes backstage, they will see the input from the broadcasting platform.
The message Audience can’t view you until you start the session will disappear once you start the session.
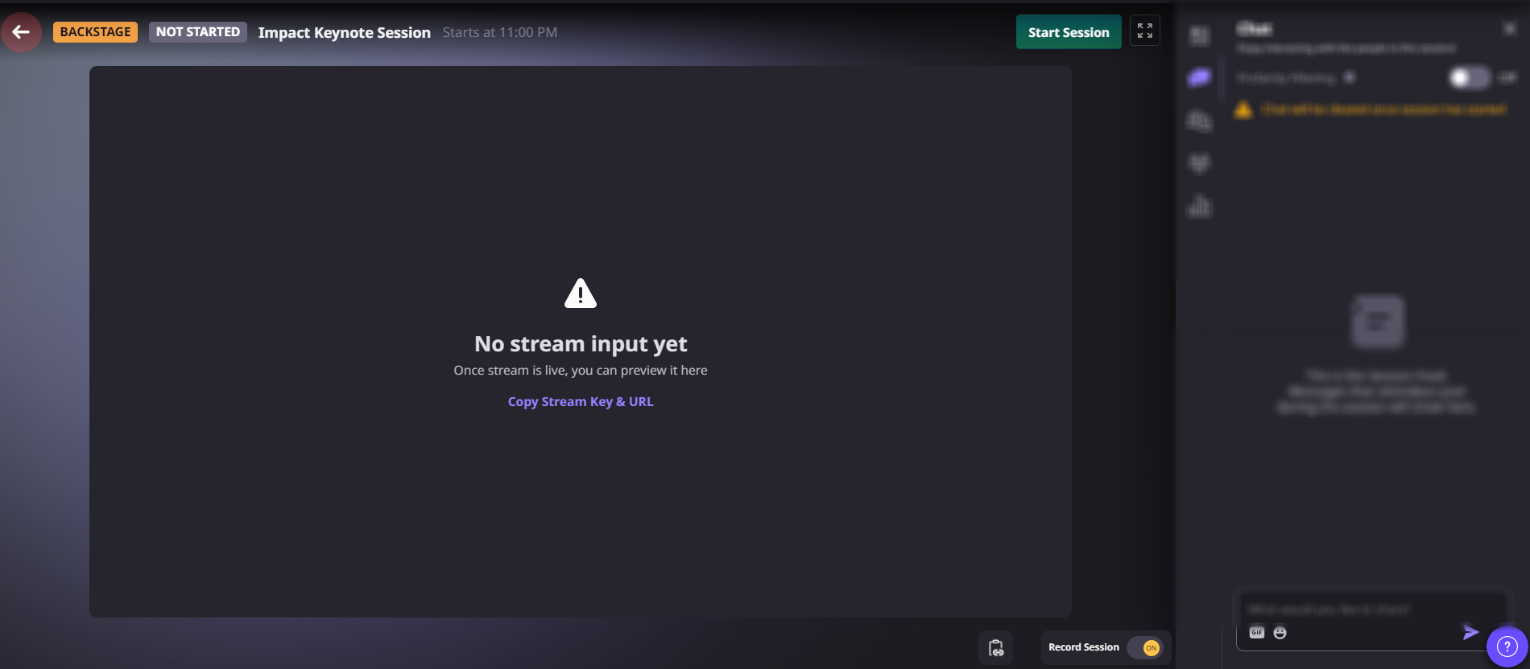
Step 3. If there’s no input from the broadcasting platform, the host will see a message indicating No stream input yet.
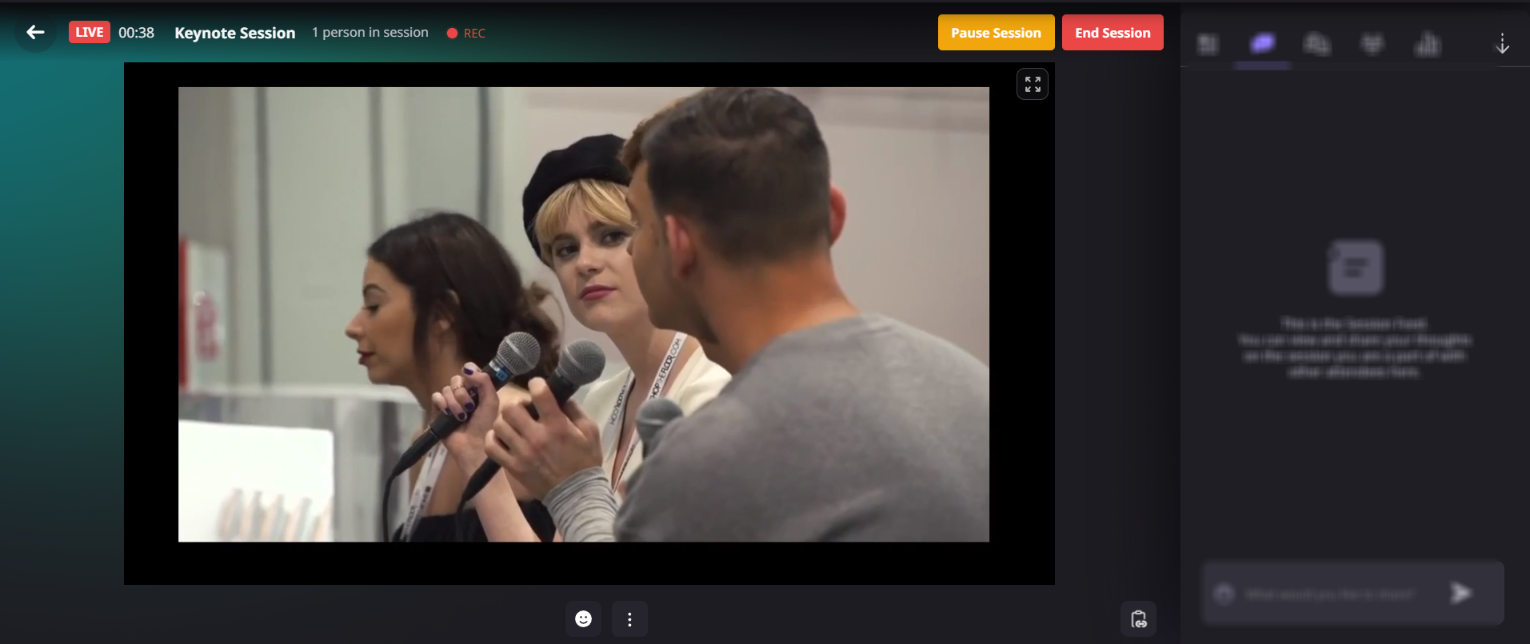
Step 4. Once you start receiving input from the broadcasting platform, click on the Start Session button on the top right. The attendees will now be able to see the broadcast.
5. Streaming software recommended settings
Important :
It is advised to use a LAN/wired connection for good streaming experience.
Using wifi might disrupt the streaming quality and continuous connection.
A/V Format
- Video Codec (Encoder) : H.264 (Main Profile) or x264
- Audio Codec : AAC
For Smooth Streaming
- Resolution: 1920x1080p
- Framerate: 30fps
- Recommended Bitrate: 5000 kbps
- Keyframe Interval: 2 seconds
For Great Streaming (Recommended for low internet bandwidth)
- Resolution: 1280x720p
- Framerate: 30fps
- Recommended Bitrate: 3500 kbps
- Keyframe Interval: 2 seconds
For Good Streaming (Recommended for bad internet bandwidth)
- Resolution: 720x480p
- Framerate: 30fps
- Recommended Bitrate: 1000 kbps
- Keyframe Interval: 5 seconds
For more detailed information about software configuration, kindly click here.
Note: If you're streaming from another 3rd party broadcasting software that provides an RTMP output, you might get black bars on the side as those platforms/software don't provide a mechanism to configure custom resolution.
6. Important Points to remember:
- There would be a latency of about ~15-20 seconds between the sent and received streams.
- through
- Raise a hand and invite to the stage will not work for a session being streamed in via RTMP.
- Neither the host nor the mapped speakers will come on stage for a session being streamed in via RTMP.
- The streaming output will be viewed all backstage in case the event level key is being used. Therefore, organizers need to ensure they start the particular day session only.
- If multiple sessions in an Airmeet are streamed via RTMP, each can use a different stream key or single key after enabling the event-level stream key.
- The session host or co-host cannot play any pre-recorded video or accept any hand-raise request.
- You cannot stream out "Stream into Airmeet" to Facebook, YouTube or RTMP
7. Streaming Domain Whitelist (optional)
Streaming won't be visible in case the above domains are blocked in the user system or network.
Whitelist all subdomains of
Need more help? Contact support@airmeet.com or visit our Customer Support Lounge.


