

TABLE OF CONTENTS
2. How to setup custom CSV and upload CSV file
2.2. Upload CSV file data and send unique links to participants
1. Overview
With Custom CSV template upload, you can preset the CSV file columns through which you add attendee details to Airmeet. Add as many data fields as you want. You can upload the data either equivalent to your custom registration form or specific details about registrants. Use the additional fields to personalize the event experience for your attendees.

Read more: How to upload a list of attendees for an Airmeet event and send invites via email?
2. How to setup custom CSV and upload CSV file
Step 1: Go to your Events dashboard > Registrations Tab > Event Access > Select Event entry as "Only invited people can enter" or "Enter via unique link" under "Register with email verification".

Step 2: Click on the "Add Attendees" button.

Step 3: Click on the "Edit Template" button and begin with adding defaults or custom fields.

2.1. Edit Form fields
Step 4: Add default fields or add custom fields that you want in the CSV template. By default, certain fields are mandatory (First, Last name & Email) to map attendee data.

Step 5: You can delete, make fields mandatory, or add Custom fields.
While entering the event, participants will be able to view and edit any custom fields added to the registration form. The remaining fields will not be visible to the participants.

Step 6: Click on the "Save" button.
Step 7: Download the Custom CSV file template with custom fields entered.

2.2. Upload CSV file data and send unique links to participants
Step 8: Enter the data on the custom template and upload the file. You can preview the uploaded file or remove it before moving forward.
Note: Please add all mandatory fields to avoid errors after uploading attendee details.
Remember, max 5000 rows and 1MB size is allowed per CSV upload.

Step 9: Once everything is in place, Preview the CSV content and click "Next"
Step 10: Once you have previewed the CSV data, you will have two options:
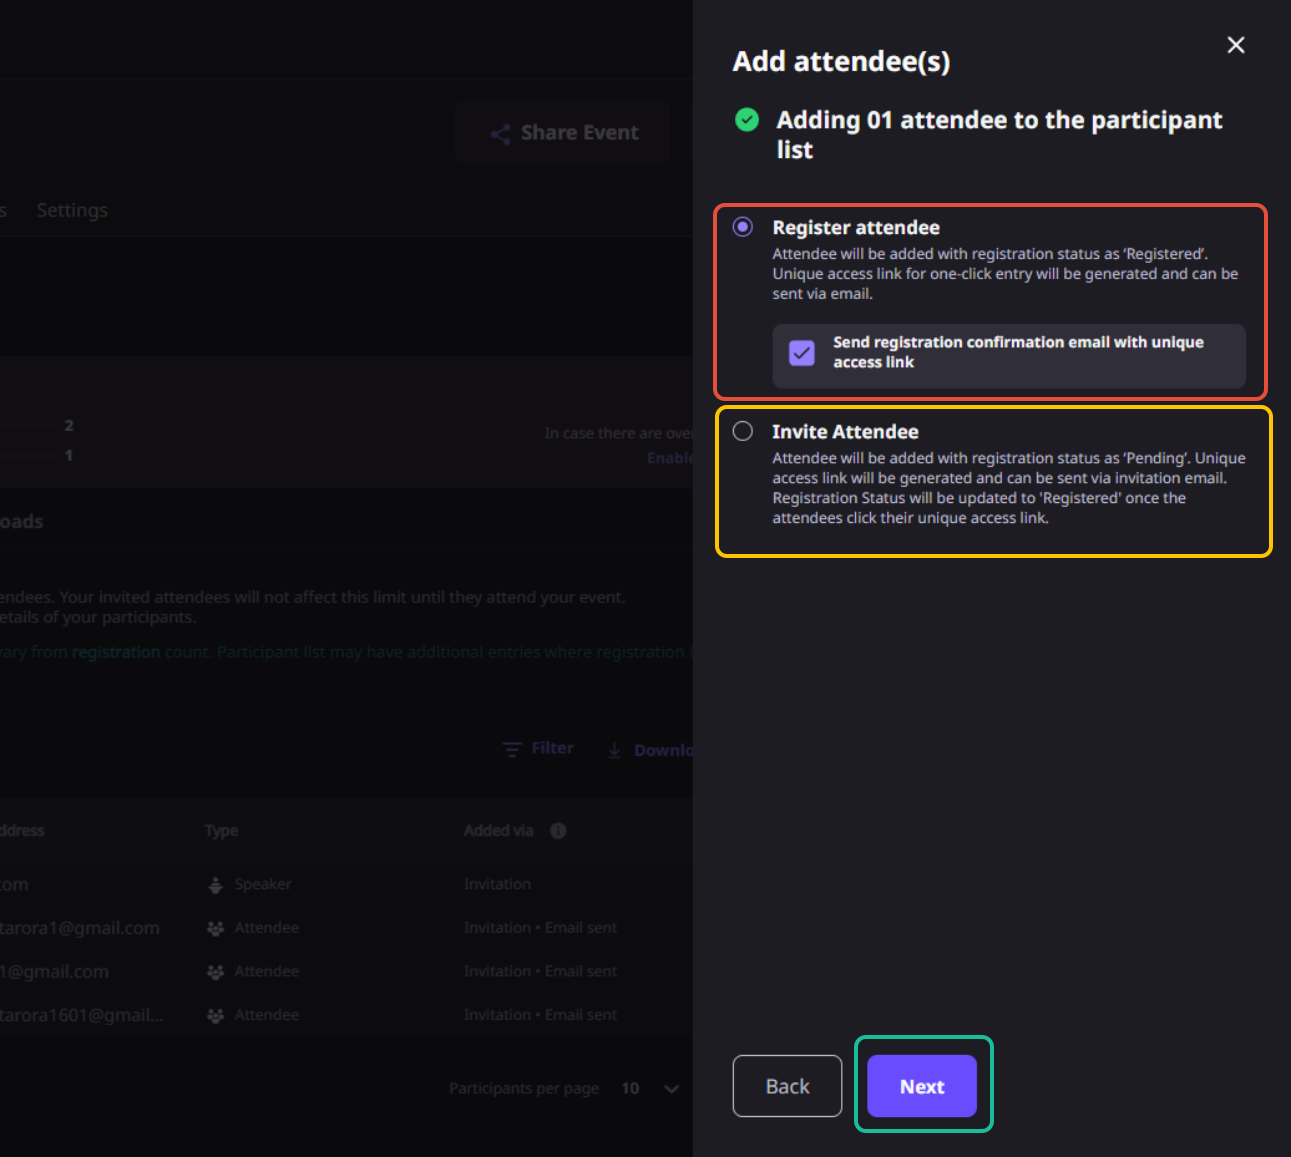
2.2.1. Register attendee
Select "Register attendee" if the attendee's registration is confirmed, and send them the confirmation email.
2.2.2. Invite attendee
Select "Invite attendee" if you want to send them the invitation first and let them confirm the registration once the attendees click their unique link.
Step 12: Once the list of attendees has been uploaded & invite type is selected, click "Next"
Step 13: Click "Next." A confirmation message will be sent, immediately triggering an email to all the attendees with their unique links to access your event.
The invited participant(s) need to click on the sent link to confirm their registration. Your registration limit will be consumed only when the participants confirm their registration.Note: If you don't want to send the email, you can still download the participant's data with the unique link from the People tab > Attendees > Download list.

Step 14: Organizers can block unwanted attendees from the participant list at any time. Blocked attendees cannot enter the event using their unique access links or login until they are unblocked.
Attendees in the live event who get blocked will be removed from the event immediately.

3. Things to keep in mind
- Customizing the registration form fields equivalent to custom CSV template fields is recommended to map the data whenever attendees enter the event.
- Enter all mandatory fields to avoid errors after uploading attendee details. Remember, max 5000 rows and 1MB size are allowed per CSV upload.
Need more help? Contact support@airmeet.com or visit our Customer Support Lounge.
Was this article helpful?
That’s Great!
Thank you for your feedback
Sorry! We couldn't be helpful
Thank you for your feedback
Feedback sent
We appreciate your effort and will try to fix the article