

TABLE OF CONTENTS
1. Overview
Collect real-time feedback with built-in surveys at both event and session levels. Measure attendee satisfaction, gather insights quickly, and continuously improve your event experience.

2. Create Survey
You can create surveys directly from the Events Dashboard. Surveys can be configured at both the event level and the session level and mapped accordingly.
2.1 Create Event Survey
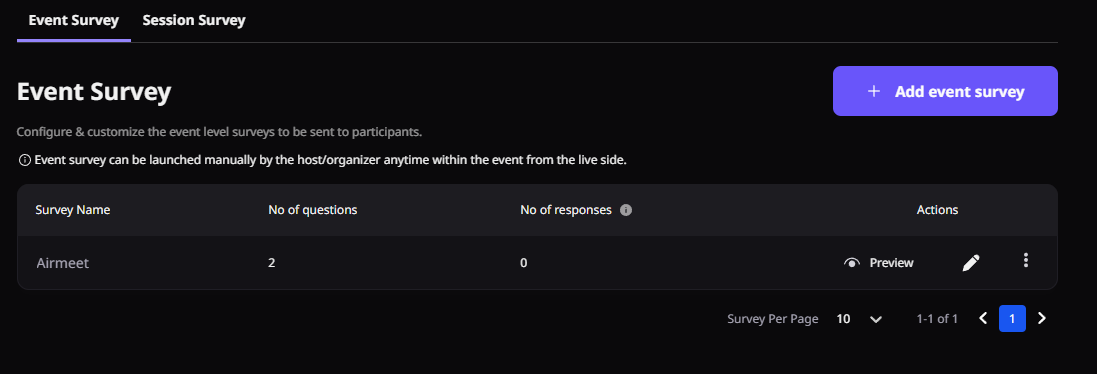
Step 1: Go to the Events Dashboard → Click on Event/Webinar Spaces → Navigate to the Survey tab on the left panel → Select Event Survey.

Step 2: Click on “+ Add Event Survey” and enter a name for your survey. This helps you easily identify it during launch.
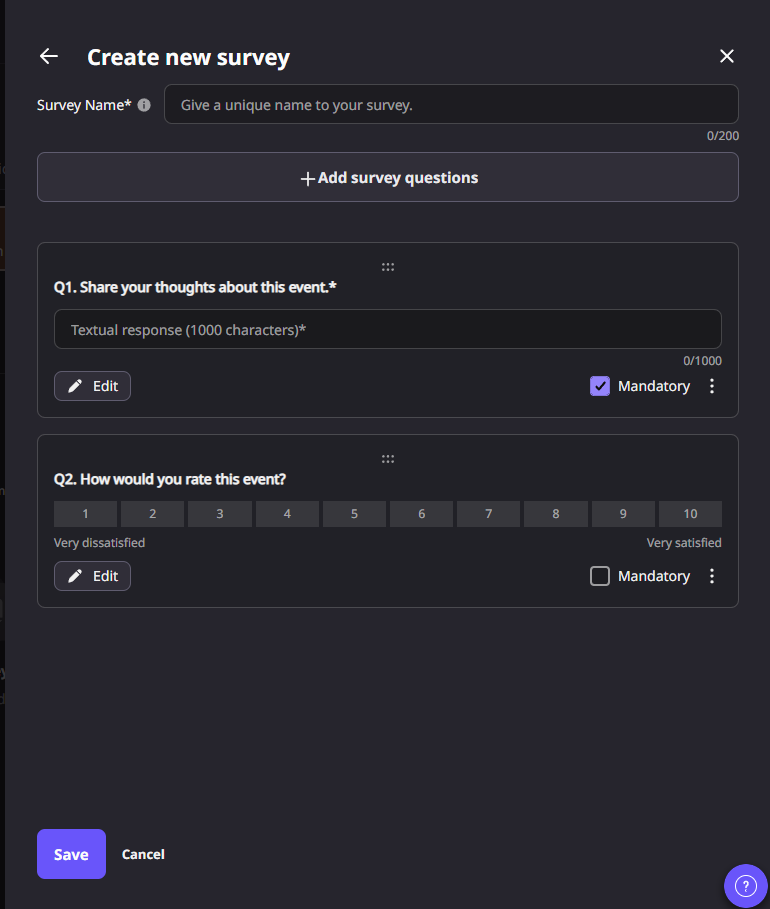
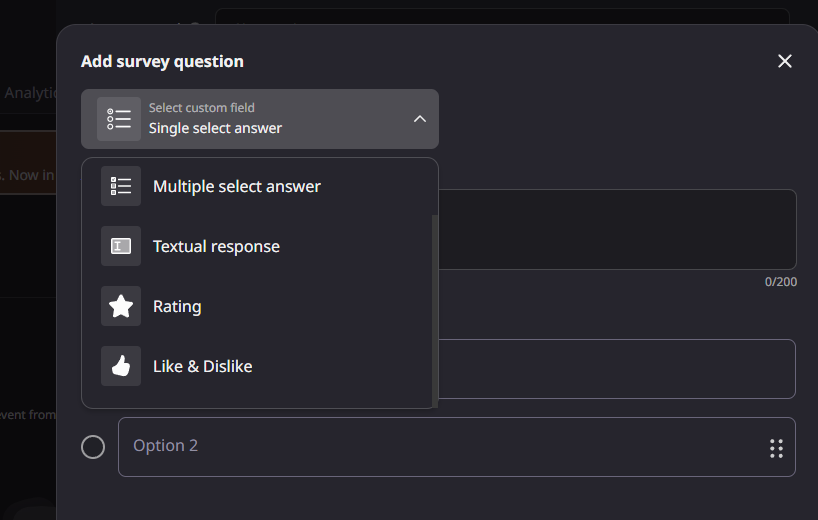
Step 3: Click on “+ Add Survey Questions” and choose the desired field type for your question.
Survey Fields:
Single Select: Add a question and define selectable options
Multi-select: Add a question with multiple selectable options
Text Response: Add an open-ended question
Rating: Add a question, define score range, and customize rating labels
Like & Dislike: Add a question and customize feedback labels

Step 4: Click “Save” and preview your survey.
Step 5: From the preview screen, you can rearrange, edit or delete
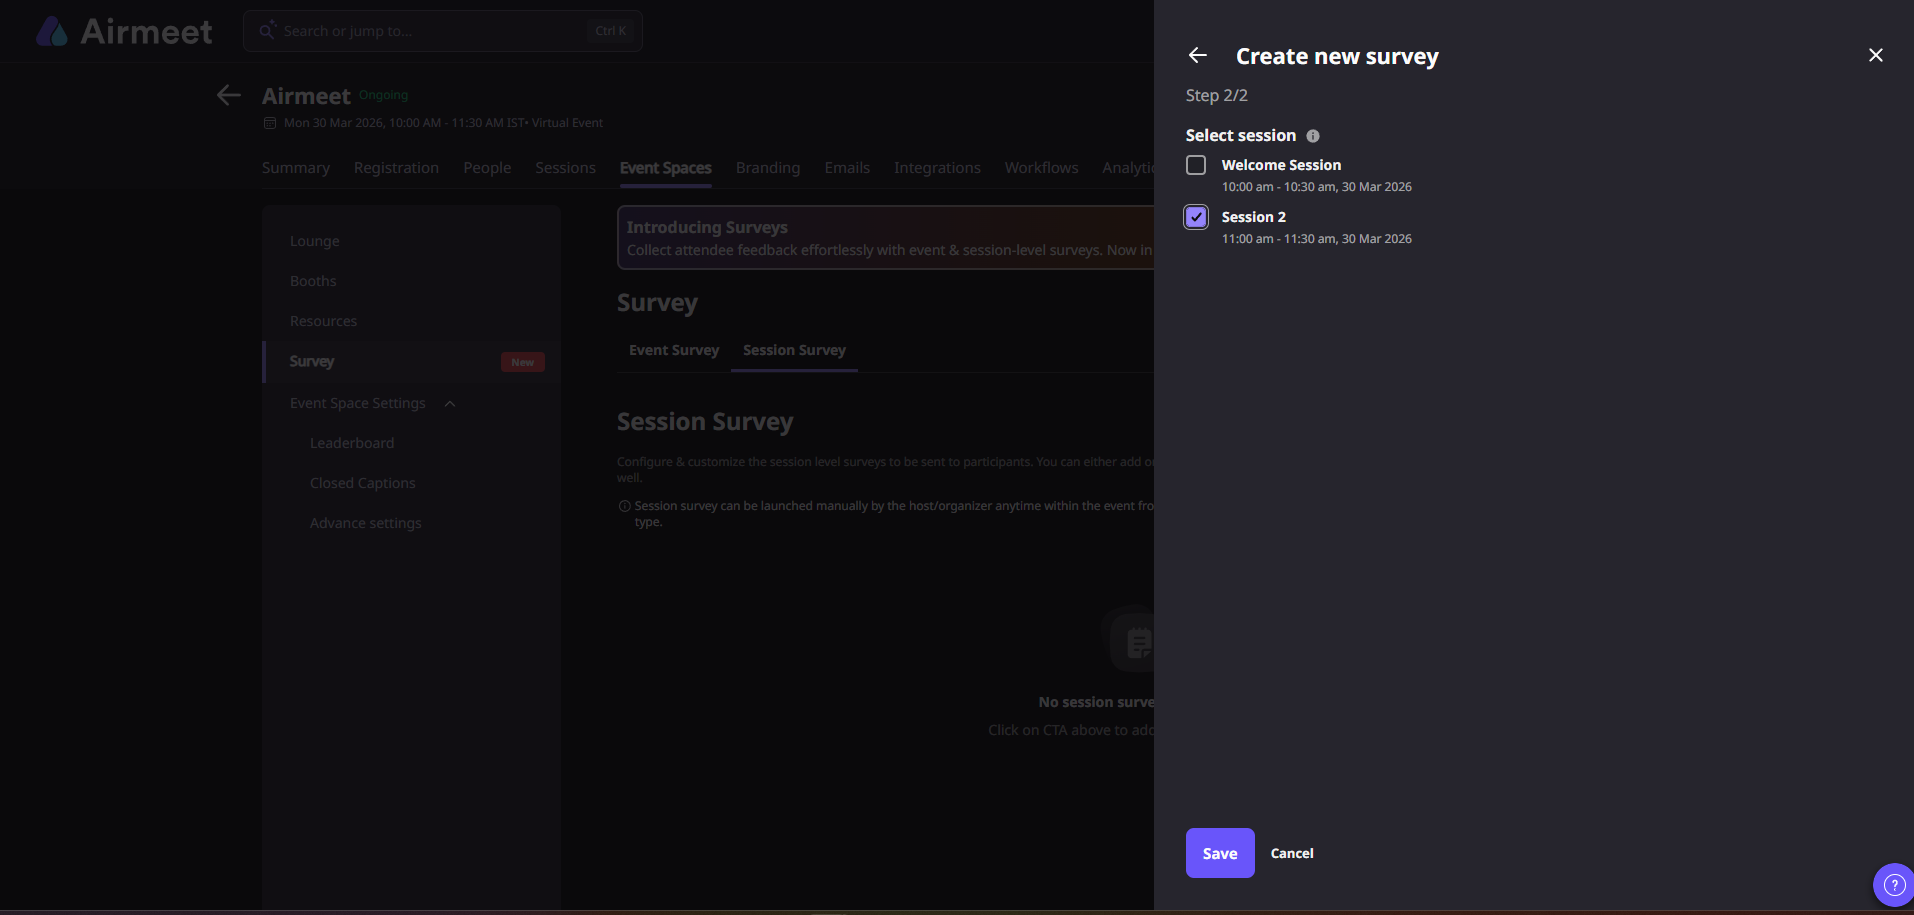
2.2 Create Session Survey
Step 1: Go to the Events Dashboard → Click on Event/Webinar Spaces → Navigate to the Survey tab → Select Session Survey.
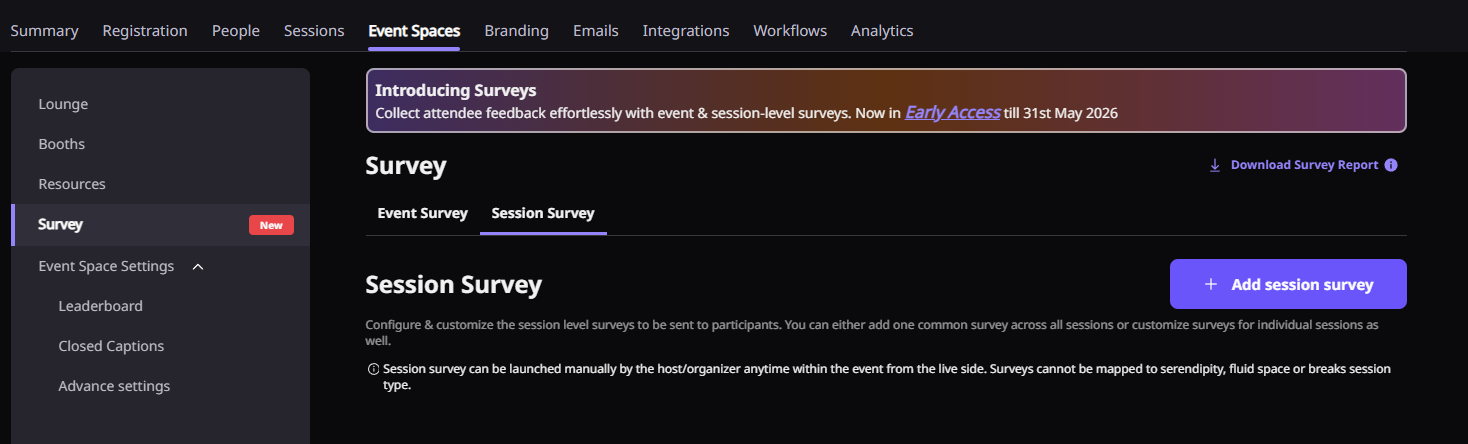
Step 2: Click on “+ Add Event Survey” and provide a name for your survey.
Step 3: Click on “+ Add Survey Questions” and select the required question type.
Survey Fields:
Single Select: Add a question and define selectable options
Multi-select: Add a question with multiple selectable options
Text Response: Add an open-ended question
Rating: Add a question, define score range, and customize rating labels
Like & Dislike: Add a question and customize feedback labels
Step 4: Click “Next” and select the session where the survey should be mapped.
Note:
Session surveys are not supported for Serendipity, Fluid Space, or Break sessions.
Step 5: Click “Save” to preview your survey.
You can rearrange, edit, delete, or mark questions as mandatory from the preview window.
3. Launch Survey
Surveys can be launched at both event level and session level, depending on how they are configured.
3.1 Launch Event Survey
Step 1: Enter your event and locate the survey icon at the top-right corner.
Step 2: Click the icon and hover over the survey you want to launch.
Step 3: Click “Preview” to review the survey or “Launch Survey” to go live.

Step 4: Once launched, the survey will appear centrally on all attendees’ screens.
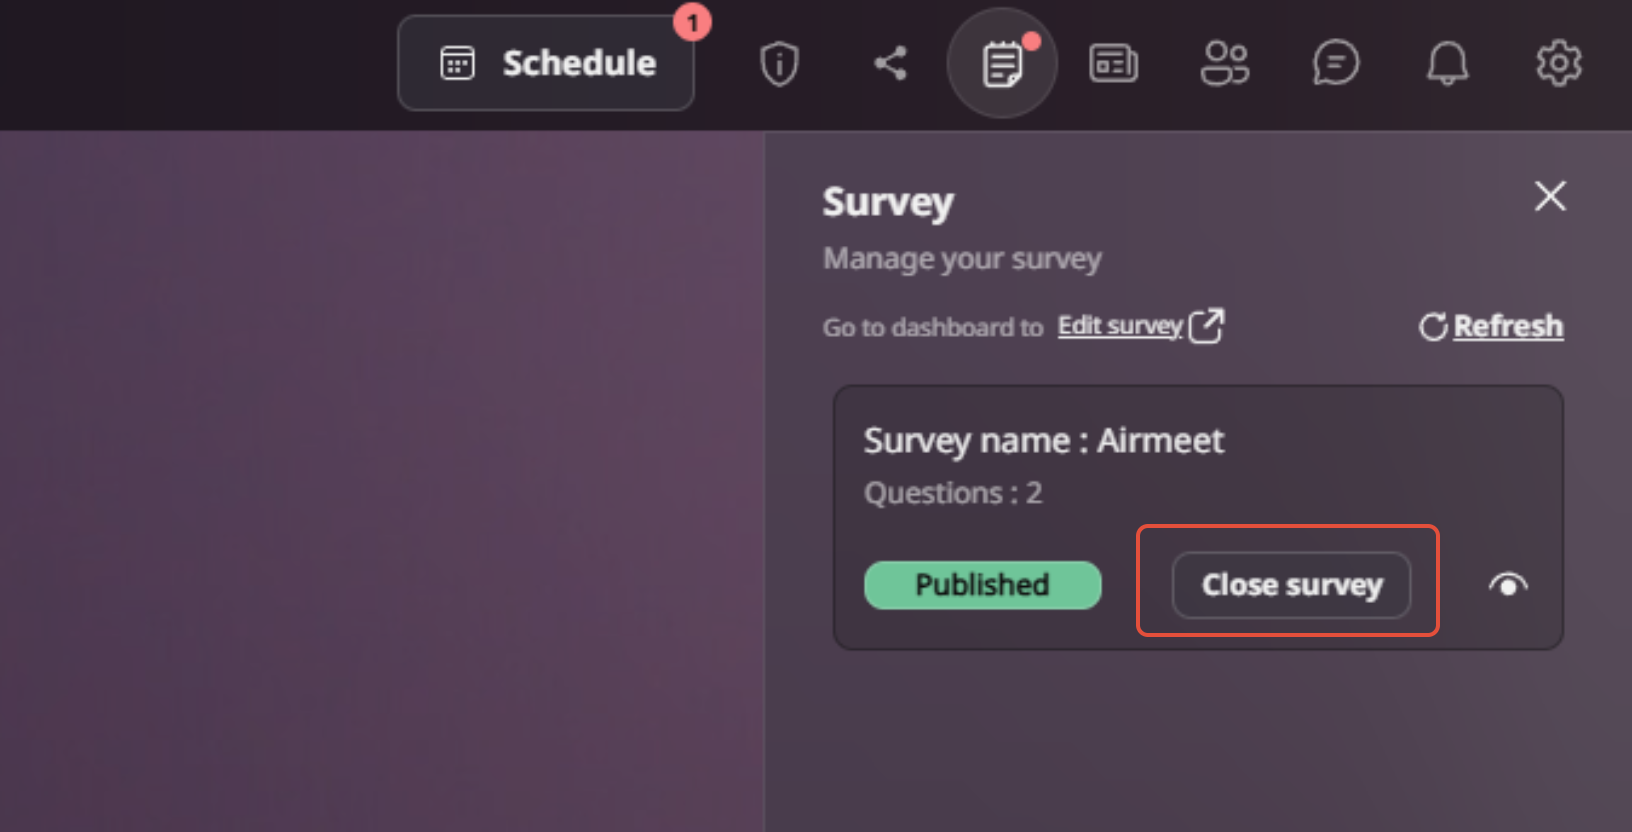
Step 5: To close the survey, click “Close Survey” and confirm by selecting “Yes.”
Once closed, the survey will no longer be visible to participants.
3.2 Launch Session Survey
Step 1: Go to the session where the survey is mapped and locate the survey icon on the right-side panel of the stage.
Step 2: Click the icon and hover over the desired survey.
Step 3: Click “Preview” or “Launch Survey.”
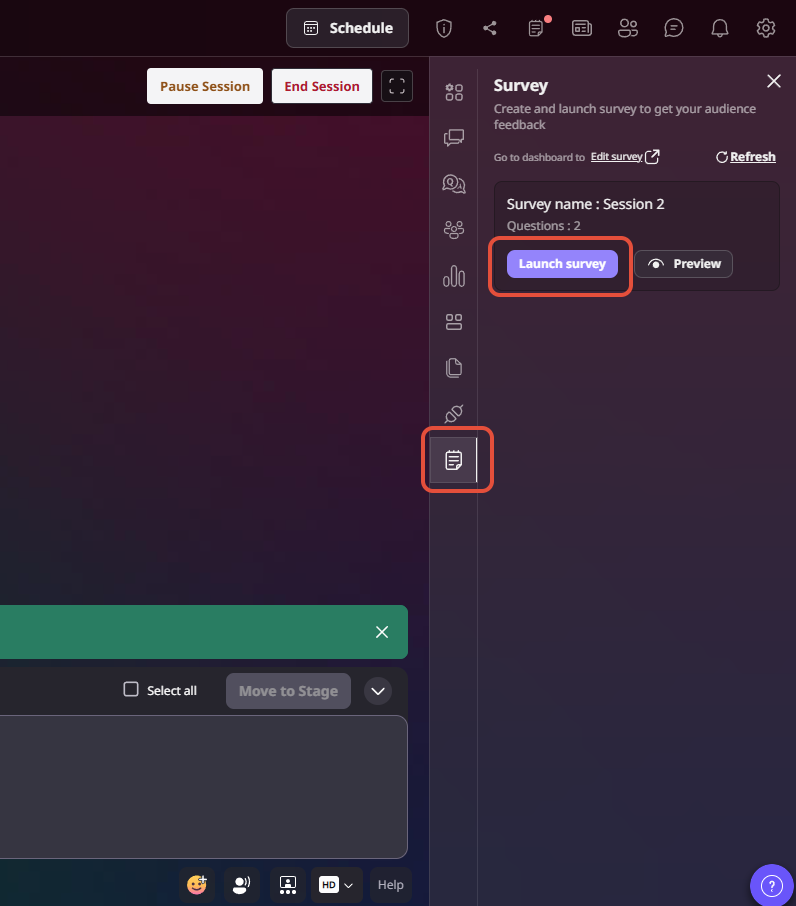
Step 4: The survey will appear centrally for all participants in the session.
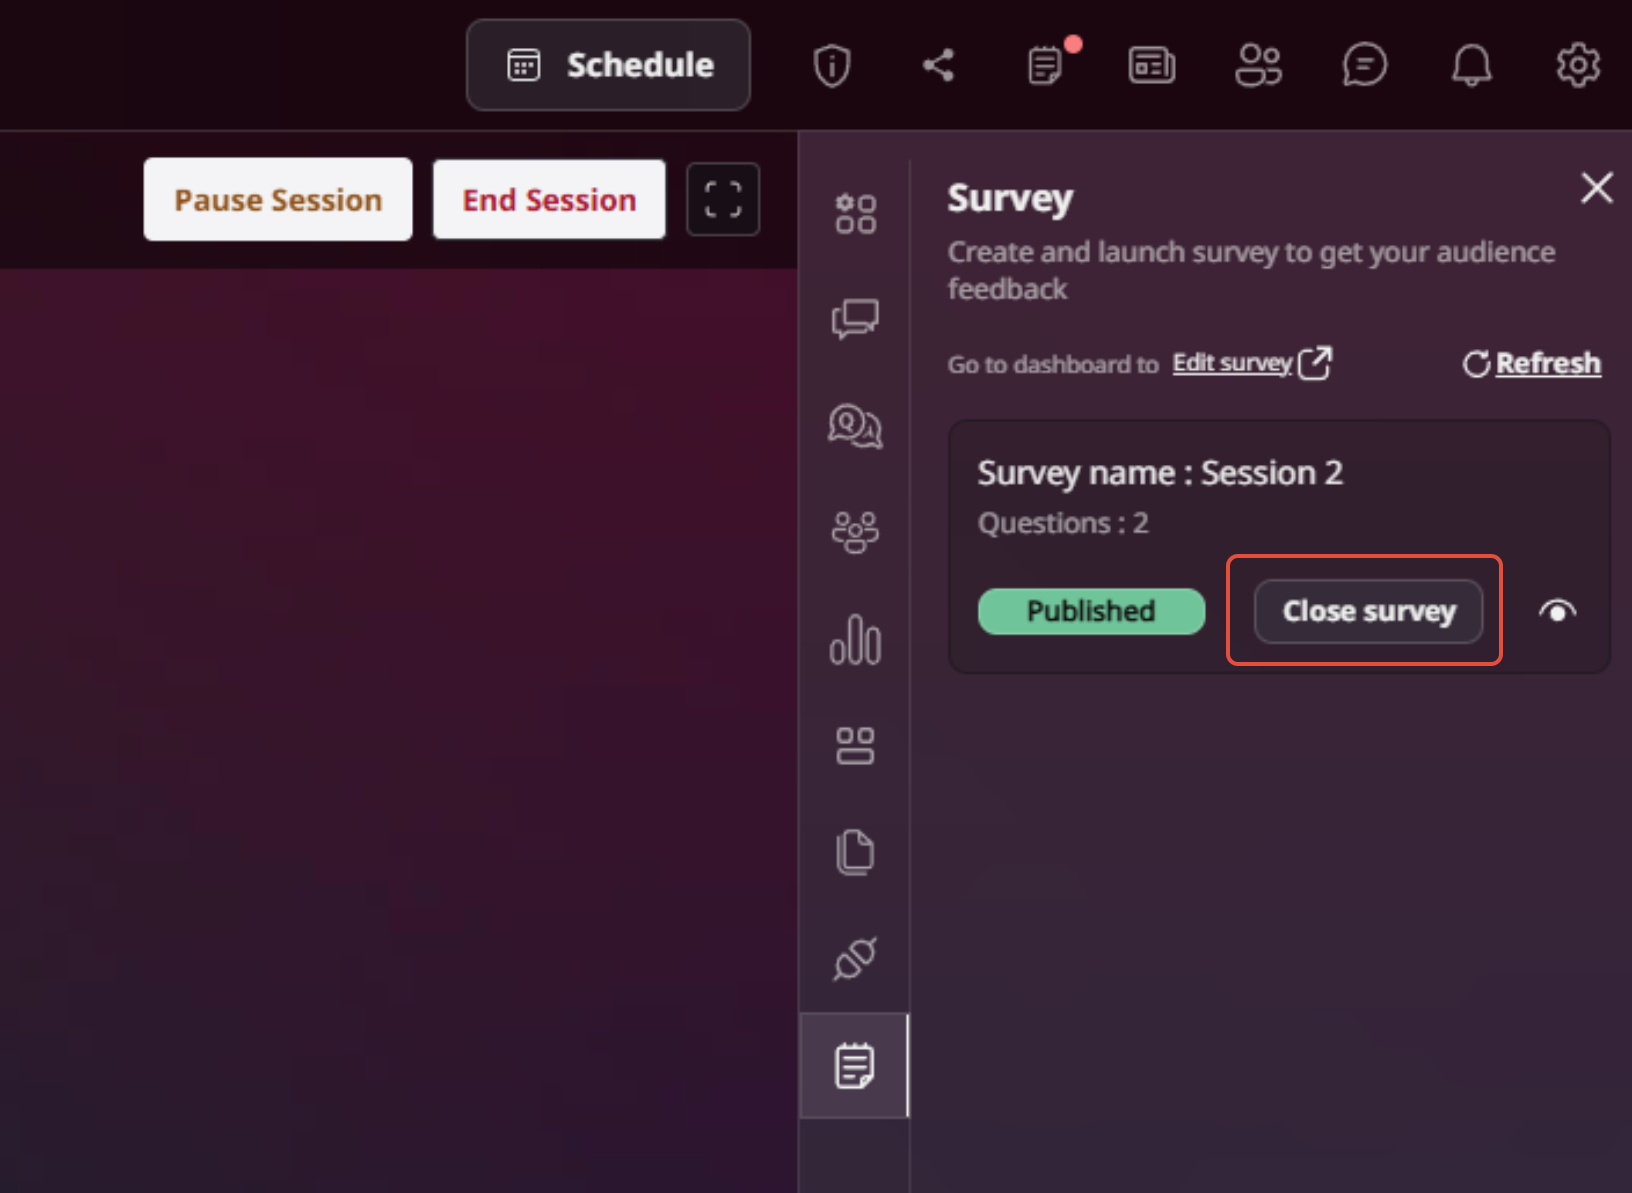
Step 5: To close the survey, click “Close Survey” and confirm with “Yes.”
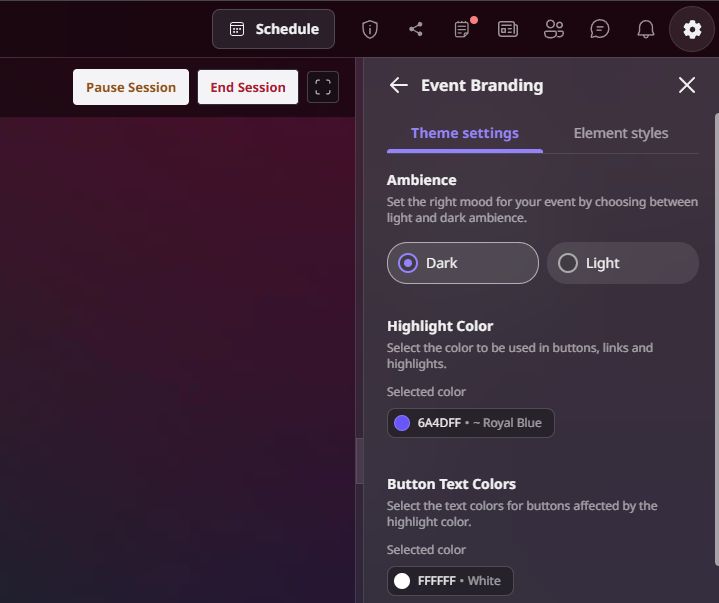
3.3 Survey Branding
Survey appearance follows your event branding settings. If you wish to change the background of the survey, you need to change the highlighted color of your event.
To update the survey background:
Go to Settings → Event Branding → Highlighted Color
Choose your preferred color and click Save
4. Reports & Responses
4.1 Survey Report
You can download survey reports directly from the dashboard.
Step 1: Go to the Survey tab and click “Download Survey Report” to export a consolidated report of all completed responses.
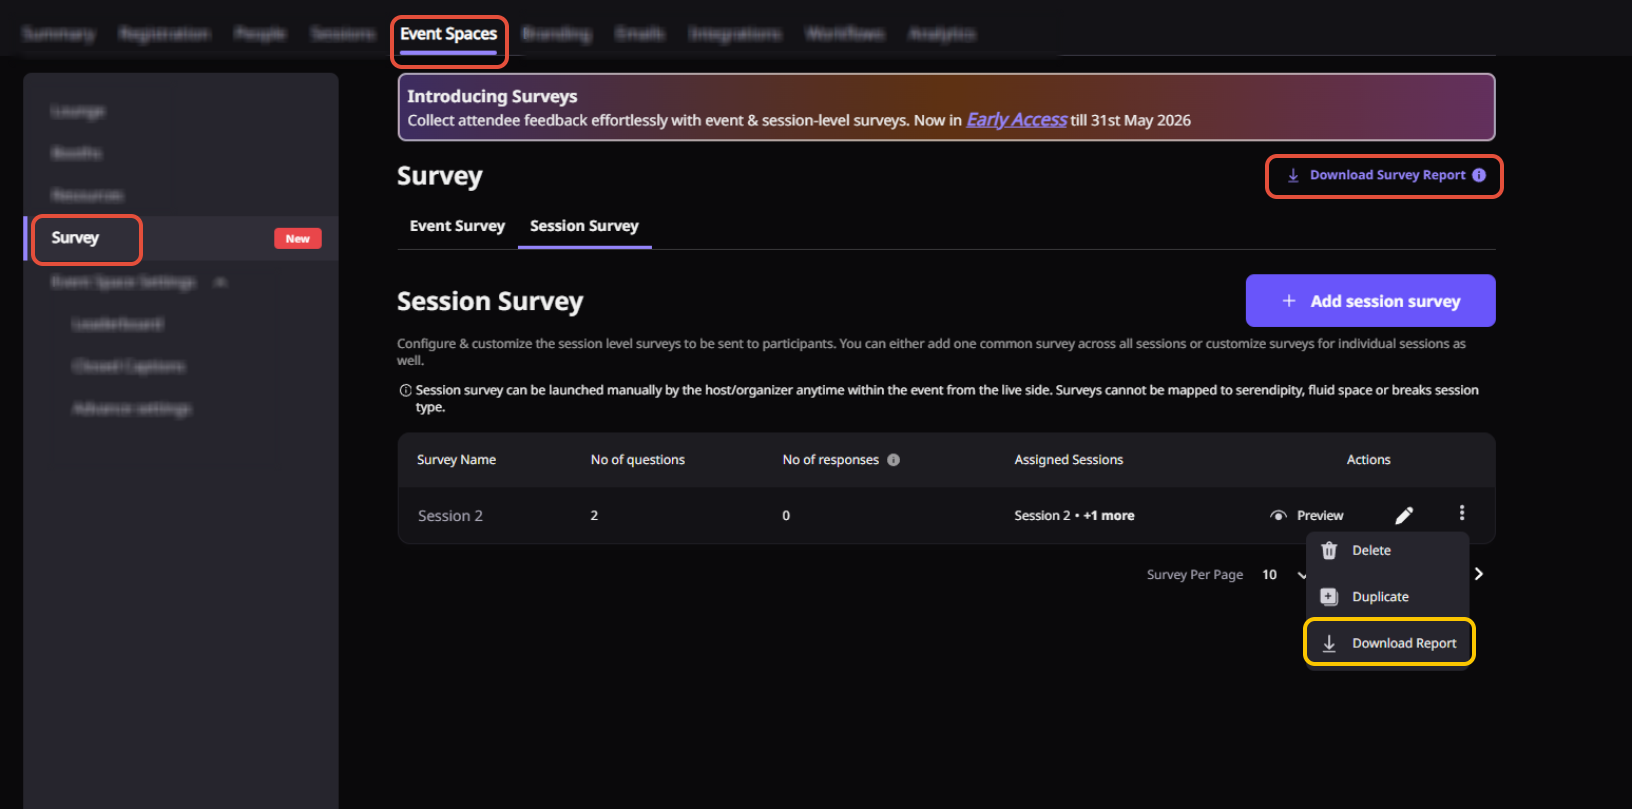
Step 2: To download a specific survey report, hover over the survey → Click on the three dots (⋮) → Select “Download Survey.”
Note: Survey reports can also be downloaded from:
Analytics → Reports → Download Survey Report
4.2 Survey Responses
Once a survey is closed, responses can be viewed from the dashboard.
Step 1: Go to the Events Dashboard → Click on Event/Webinar Spaces → Navigate to the Survey tab.
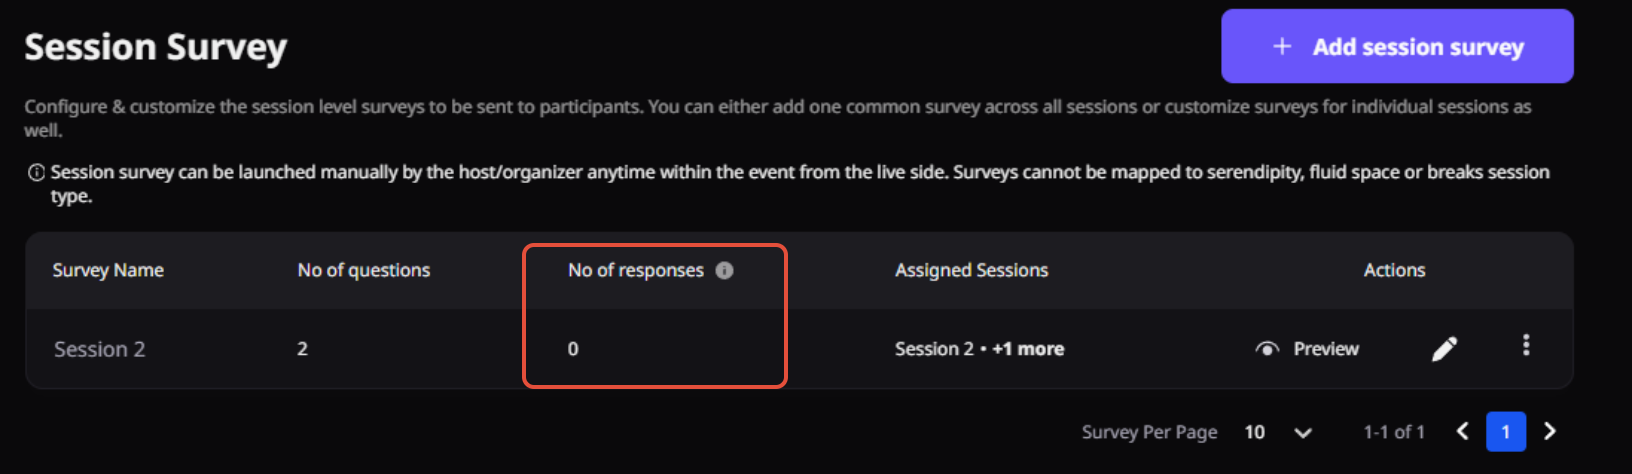
Step 2: View the number of responses received for each survey.
5. Things to Keep in Mind
1. Surveys can only be launched and submitted via web browsers (not supported on mobile browsers)
2. Only one event survey can be active at a time
3. Surveys can be launched only when the event is live or open
4. Surveys are supported in event replay mode
5. This feature is currently in early access (beta), so minor discrepancies may occur.
Need more help? Contact support@airmeet.com or visit our 24*7 Support Lounge.
Was this article helpful?
That’s Great!
Thank you for your feedback
Sorry! We couldn't be helpful
Thank you for your feedback
Feedback sent
We appreciate your effort and will try to fix the article