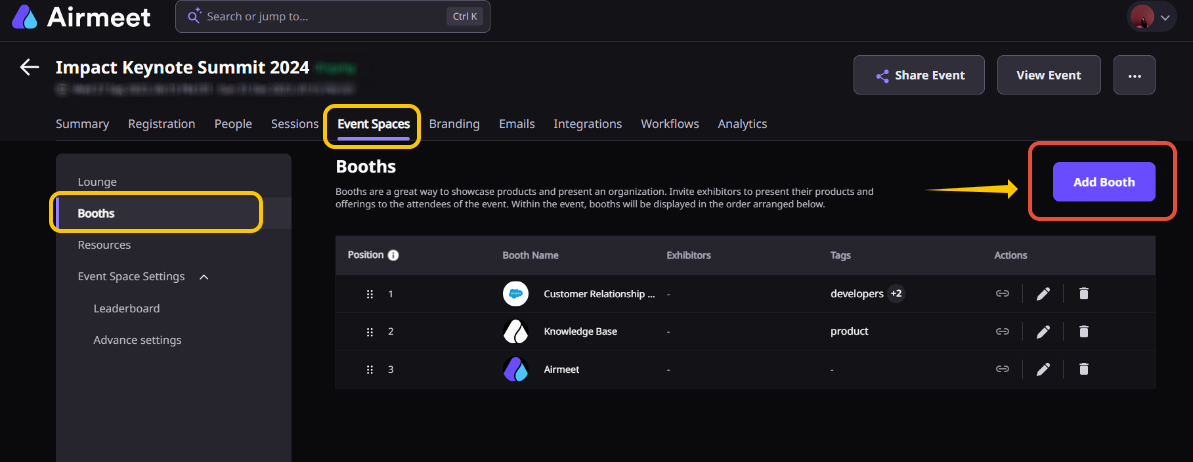
1. Adding Booth from the Dashboard
Step 1: Go to the event's dashboard > Event Spaces tab and click on the "Booths" tab. Next, click on the "+Add booth" button to add a booth in the booths section.
Step 2: Add details like the booth name, booth logo, booth tags, and booth exhibitor. You can also align the booth position by dragging it from the event dashboard.
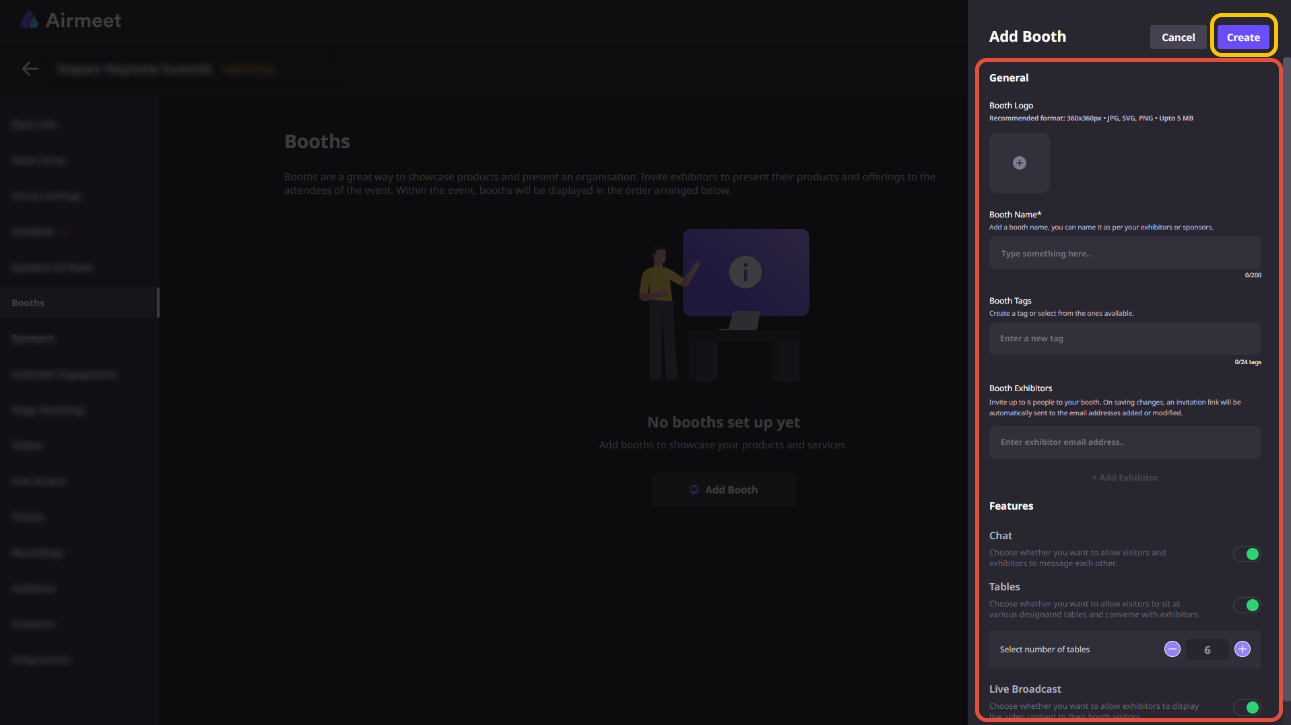
As an event organizer, you can enable or disable a few features according to exhibitor needs.
Chat: You can enable or disable the chat feature for a visitor to put their questions on a common booth chat.
Live broadcast: Enable or disable the live broadcast for your particular booth.
Step 1: From the event dashboard, click on the Booths tab, then scroll down to the 'Permissions' section and
Step 2: Toggle on 'Allow exhibitors to edit more booth details', and save the booth details.

1.4. Customize Booth
Step 3: After the booth is added to the dashboard, the event organizer or booth exhibitors can set up the booth by entering the Airmeet event.
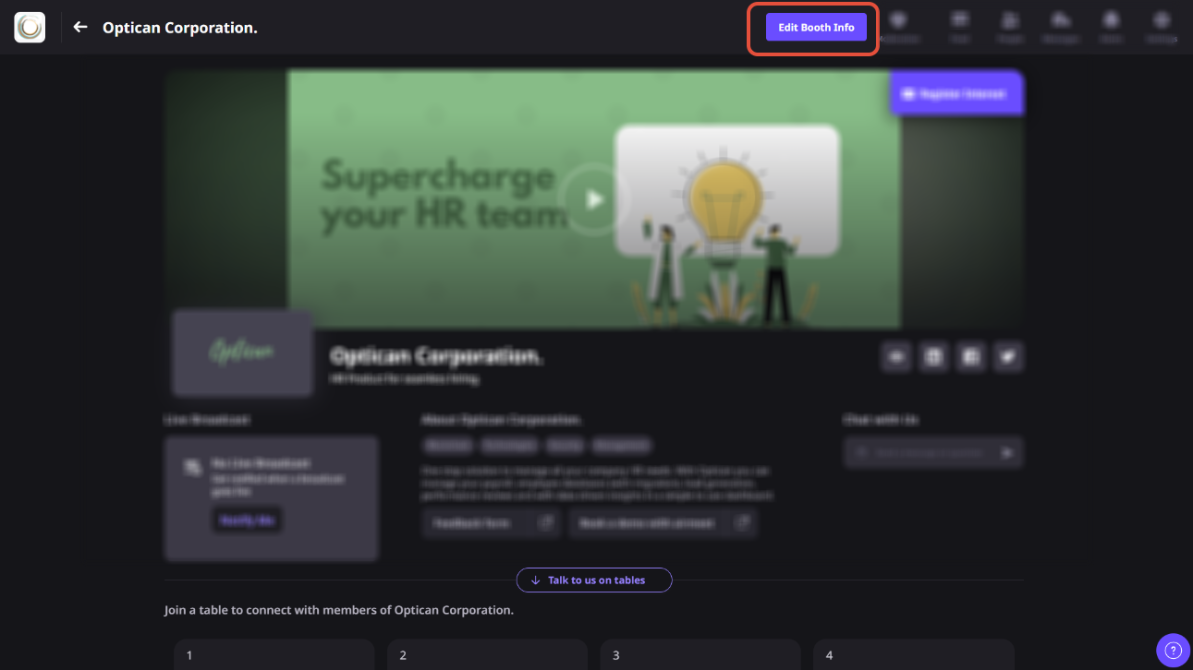
As an organizer, you can visit any particular booth and click on "Edit Booth Info."

2. Booth Setup (For Booth Exhibitors and Event organizers)
Airmeet has three different templates of booths that the organizer can use to enhance participants' experiences.
For the Branding Guide (Virtual Event Format), click here.
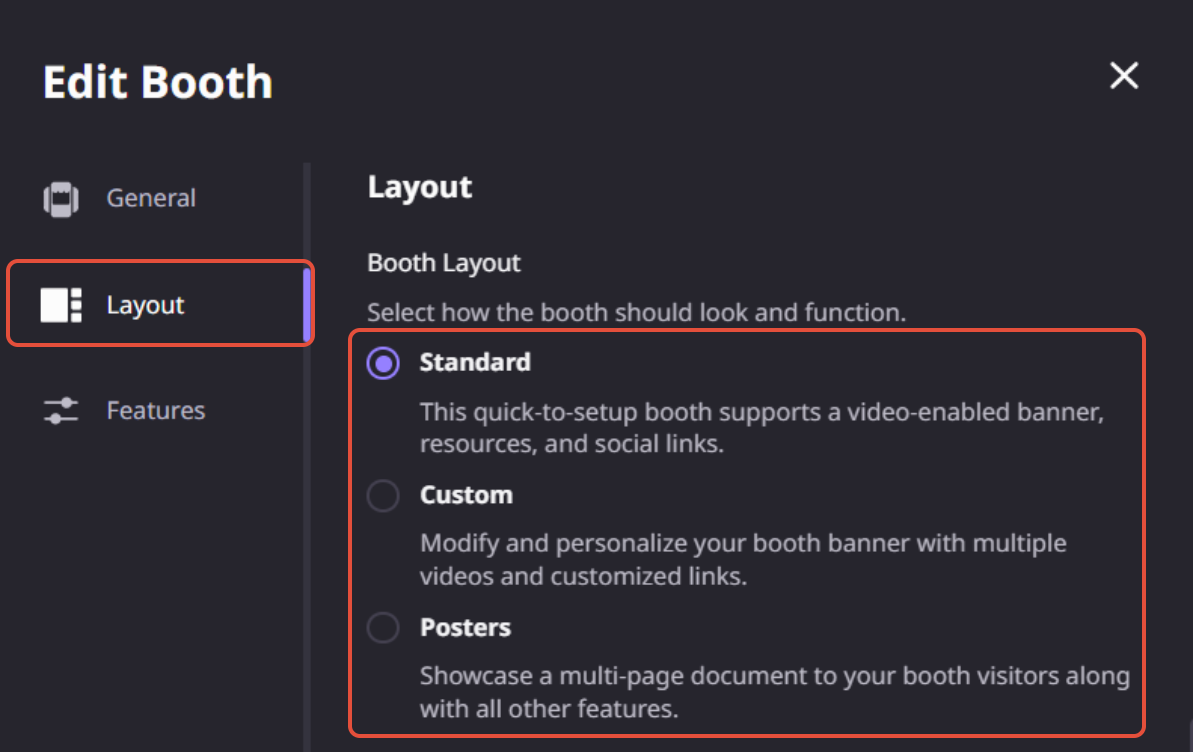
1. Standard Booth template: Displays the booth banner along with the booth logo, resources, & social media links on a single page.
2. Custom Booth template: A fully customized booth having the option to embed a video and transparent clickable links to redirect your participants to different resources & social links.
3. Posters: Showcase a multi-page PDF document to your booth visitors along with all other features.
Steps to follow: -
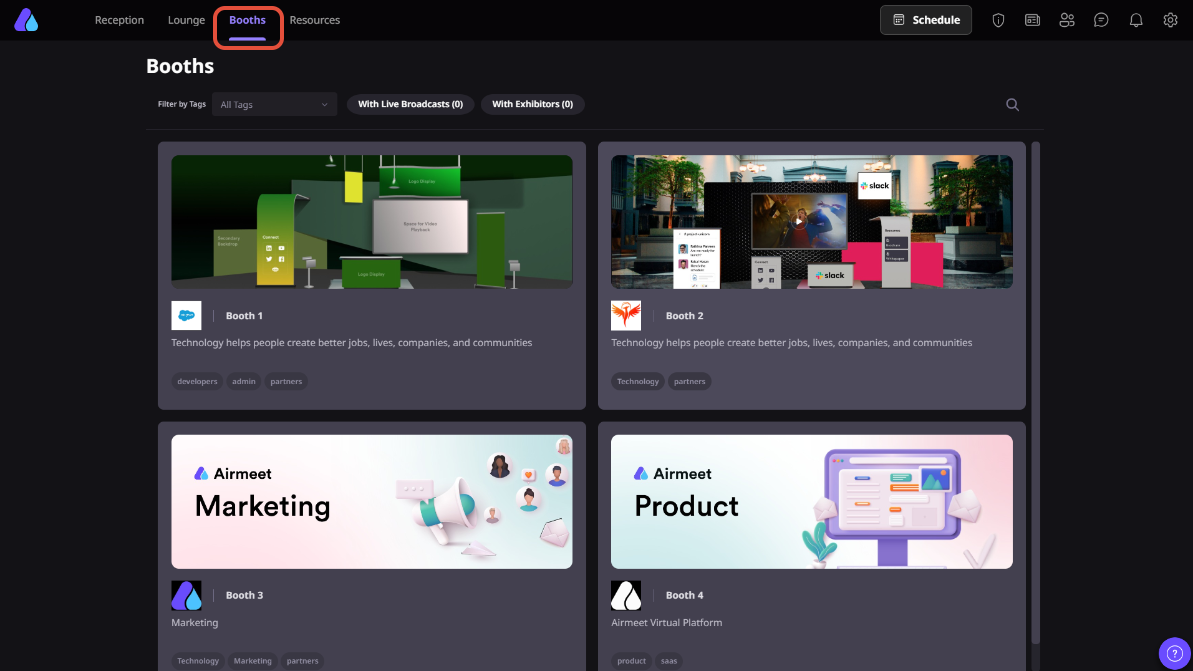
Step 1. Click on the 'Booth' button on the top left-hand side of the event page and choose/click on the booth you want to edit.
Joining as an exhibitor, you would be able to access your booth directly in edit mode. Then, you can set up the booth accordingly from the event organizer's access link provided on your email ID.
Step 2. Click on Edit Booth Info from the top right side of the page.
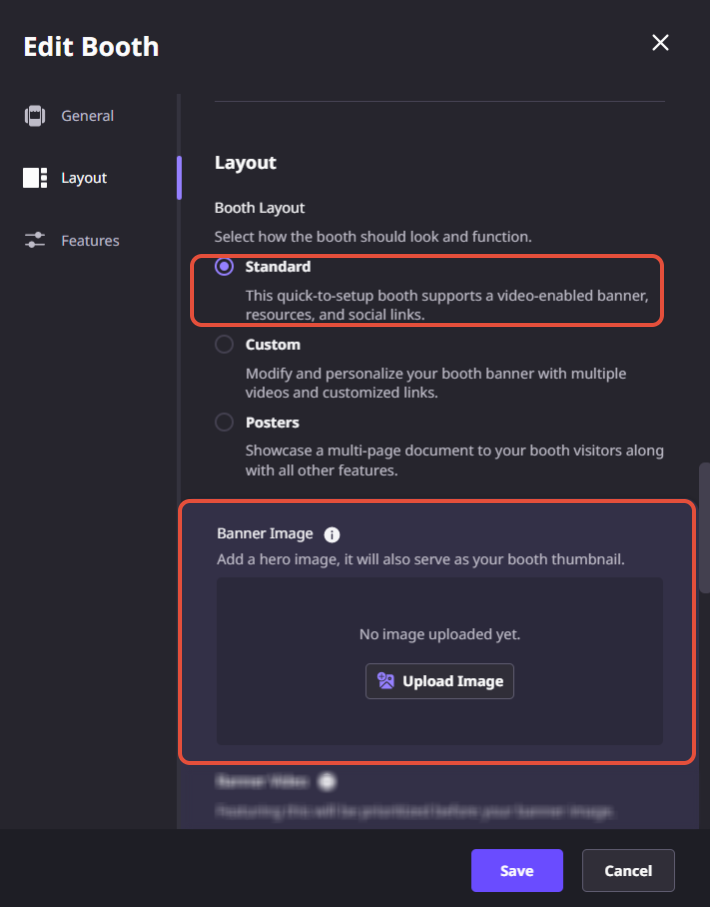
After clicking on the "Edit Booth" option, you will see three layout options to select, i.e., Standard Layout, Custom Booth Layout, and posters-based Layout.
3. Standard Template Setup
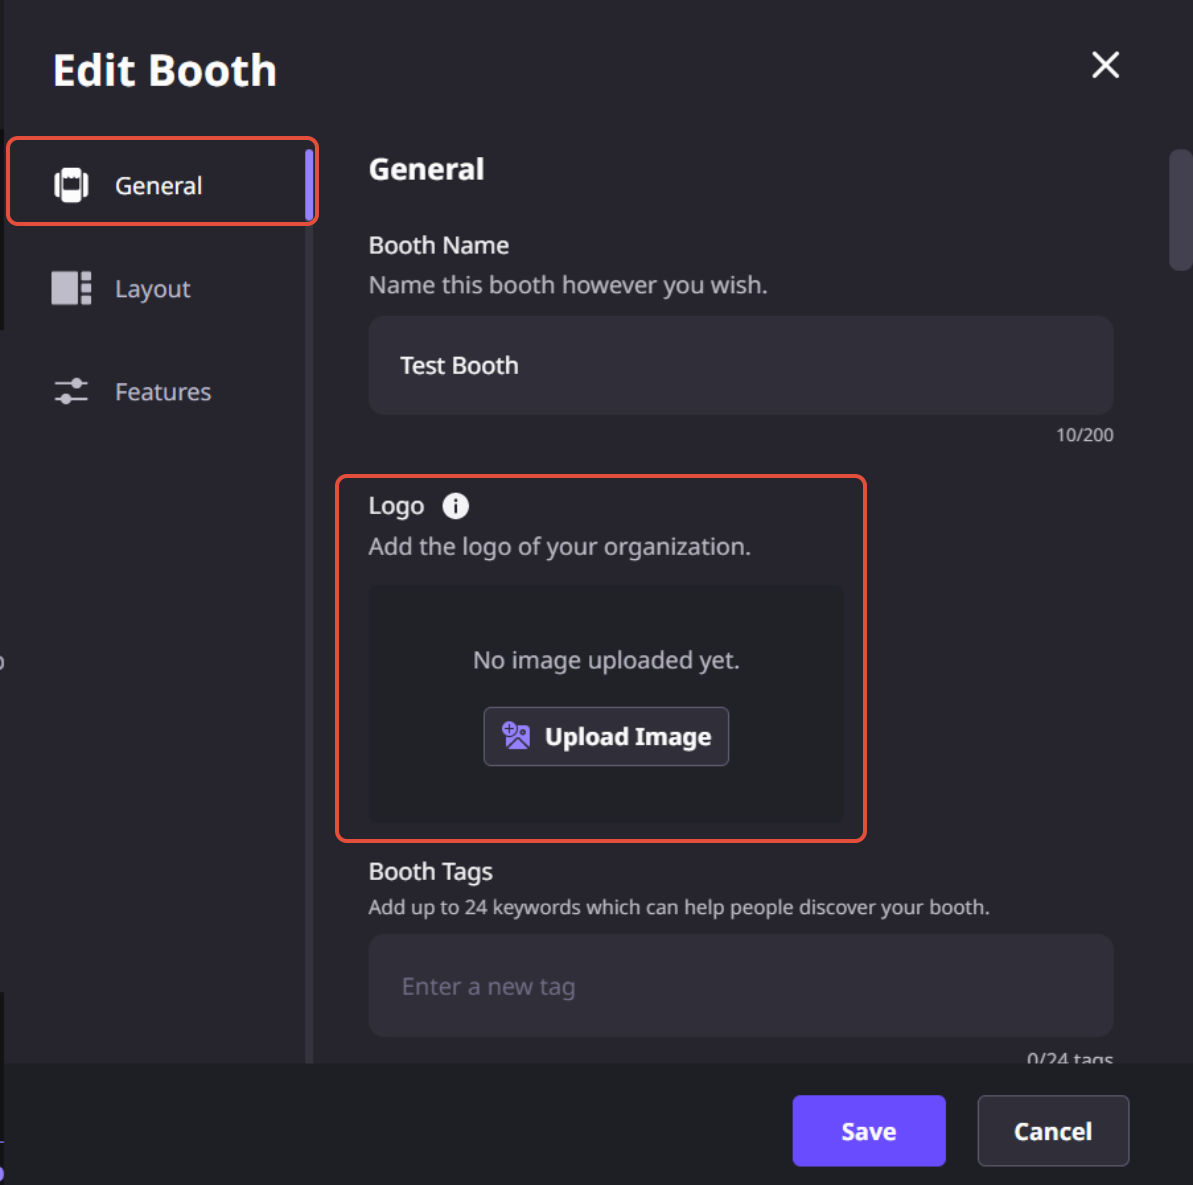
a) Booth Logo and booth Banner
Booth Logo Specifications
- Recommended dimensions - 960px*480px
- Supported formats - JPG, SVG, PNG
- Maximum file size 5 MB.
Booth Banner/Card Specifications
- Recommended banner dimensions - 1200px*400px
- Supported formats - JPG, SVG, PNG
- Maximum file size up to 2 MB.
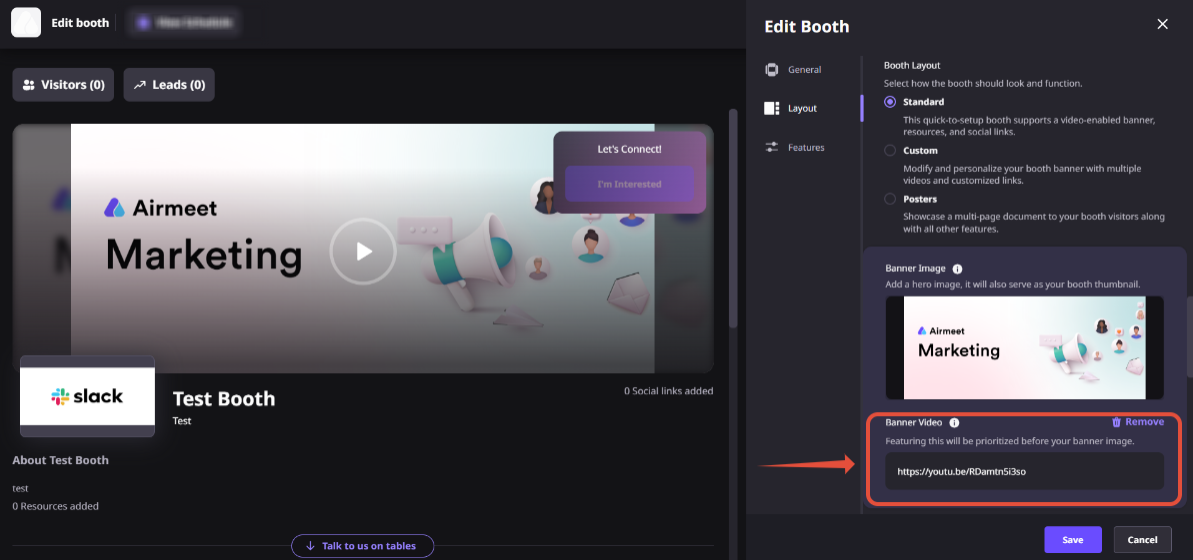
b) Video to play in the booth
Also, you can add a video to your booth by inserting a video link into the Banner Video space.
Note: Banner video can only be added through the link.
URLs, such as video file paths supported, can be from YouTube, Facebook, Twitch, SoundCloud, Streamable, Vimeo (publicly listed), Wistia, Mixcloud, and DailyMotion. Loom videos are an exception.
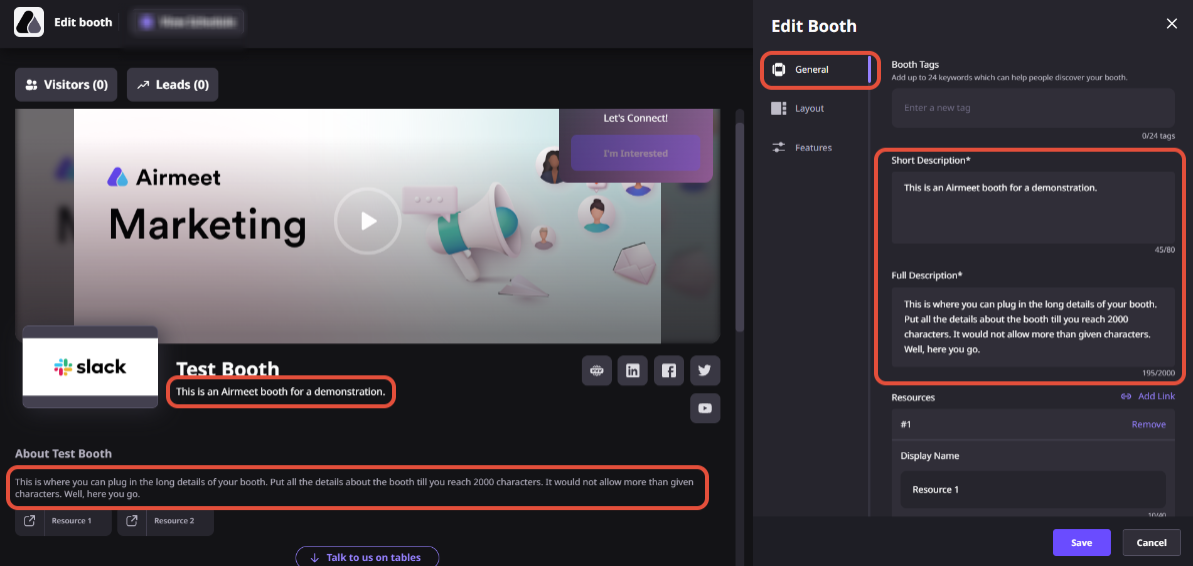
c) Booth Descriptions
Add booth descriptions
1. Short descriptions: up to 80 alphanumeric characters
2. Long descriptions: up to 2000 alphanumeric characters.
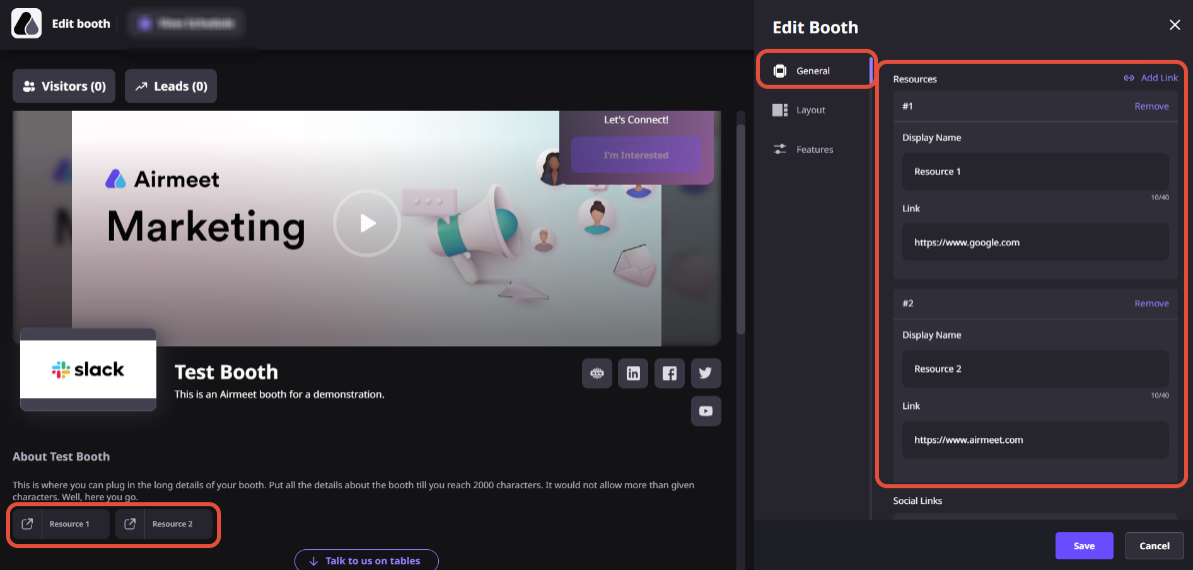
d) Booth Resources
The resources link will be hyperlinked to the booth. You can only add up to five resources in a single booth.
e) Booth Social Media Links
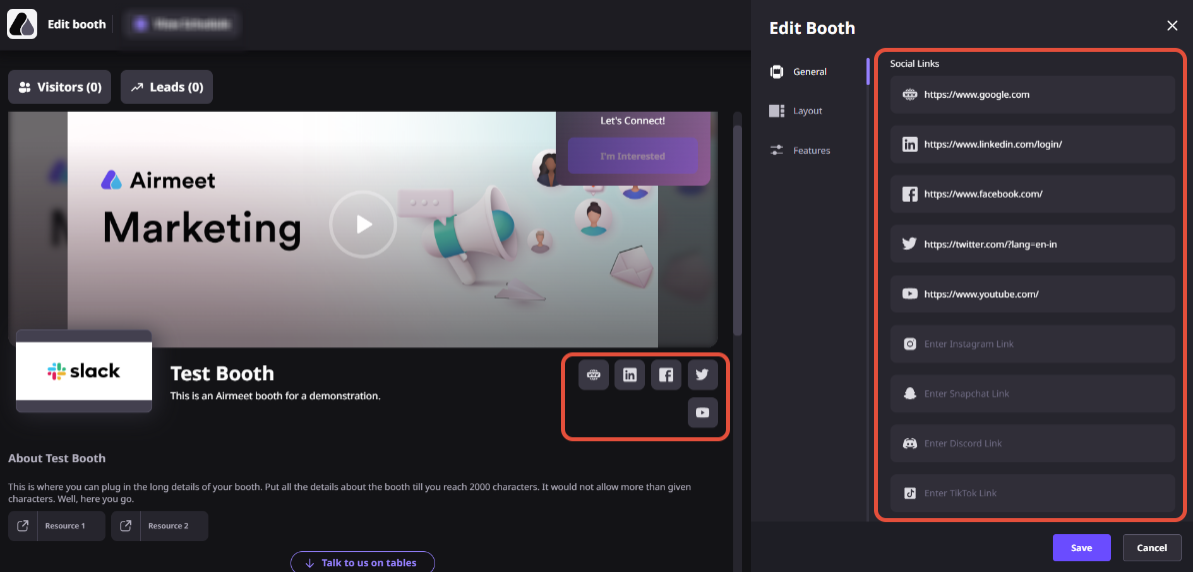
Note: Kindly disable any ad blocker in case you are unable to see social media icons while setting up the booth.
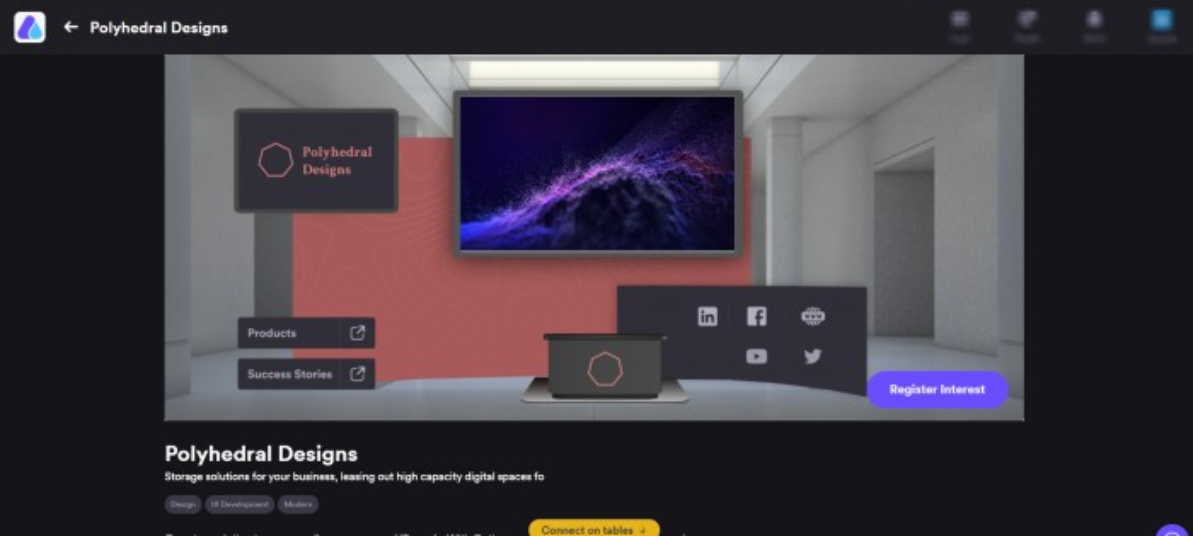
Custom booth requires the booth banner & logo to be uploaded along with the description of the booth. You can add up to 5 videos and any number of links to your customized booth image.

The custom booth includes 3 elements that can be dragged and dropped on a canvas to set it up by clicking on "Edit Banner Design".
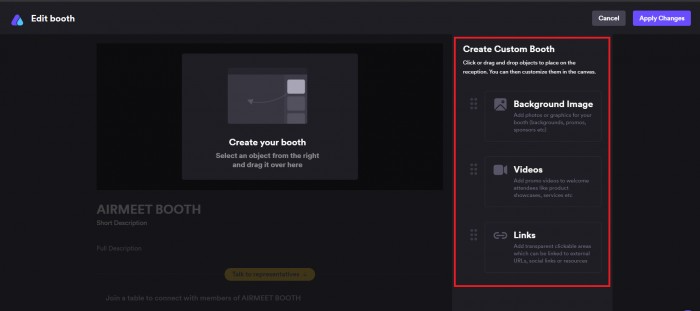
4.1. Background Image
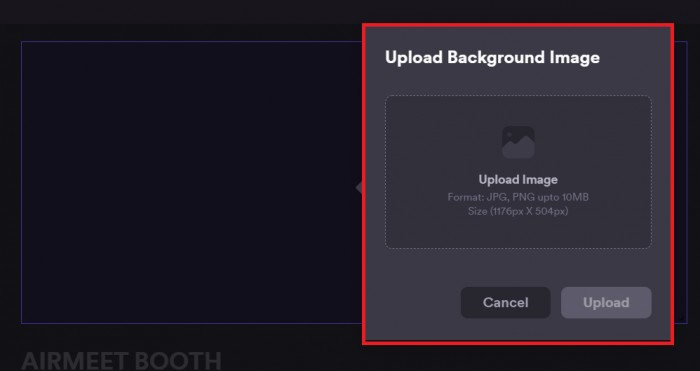
Add a “background image” (3D or a 2D image) by dragging & dropping the background image, you can place videos or links on your image.
To edit or remove the image uploaded, click on the uploaded image and select the delete option. To re-upload the image, click on the edit option to re-upload.

Recommended Dimensions - 1176px *504px
Supported formats - JPEG, PNG, SVG
Maximum file size up to 10 MB.
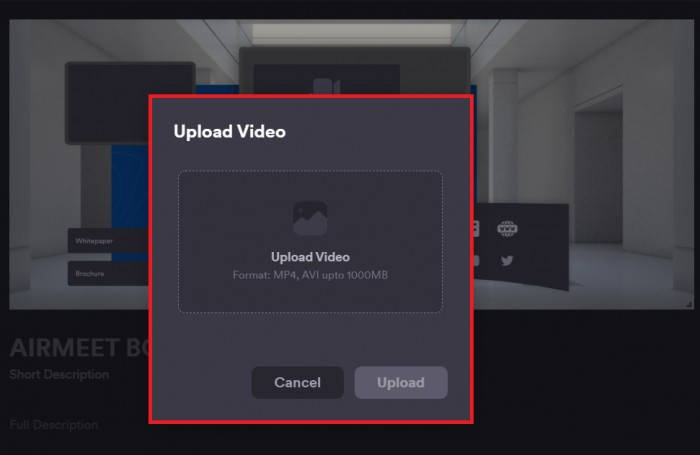
4.2. Videos
Add a video on the reception background image by dragging & dropping the video object and uploading the video. You can place & resize the video once it's been uploaded.
Note: Videos will be on mute & auto-played by default. Attendees will have the option to unmute and make the video Fullscreen at their convenience.
To edit or remove the video uploaded, click on the “uploaded video” and select the “delete” option or the “edit” option to re-upload the video.
Supported formats - MP4, AVIMaximum file size up to 1000 MB.
4.3. Links
To add a link, drag and drop the links object and select a destination. Then, you can place & resize the transparent link.
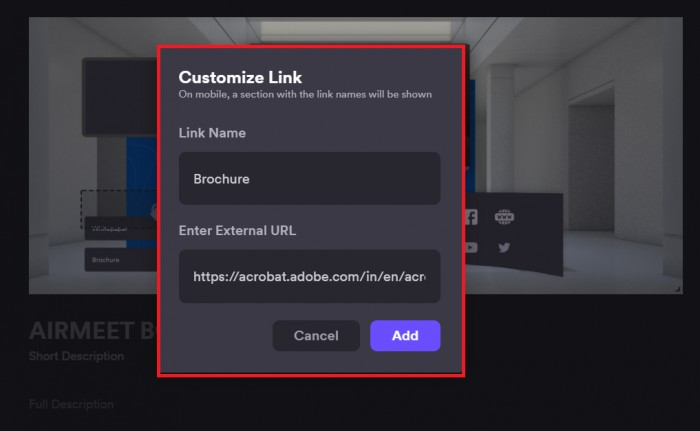
Note: The link will open in another tab of the browser.
Final View: -
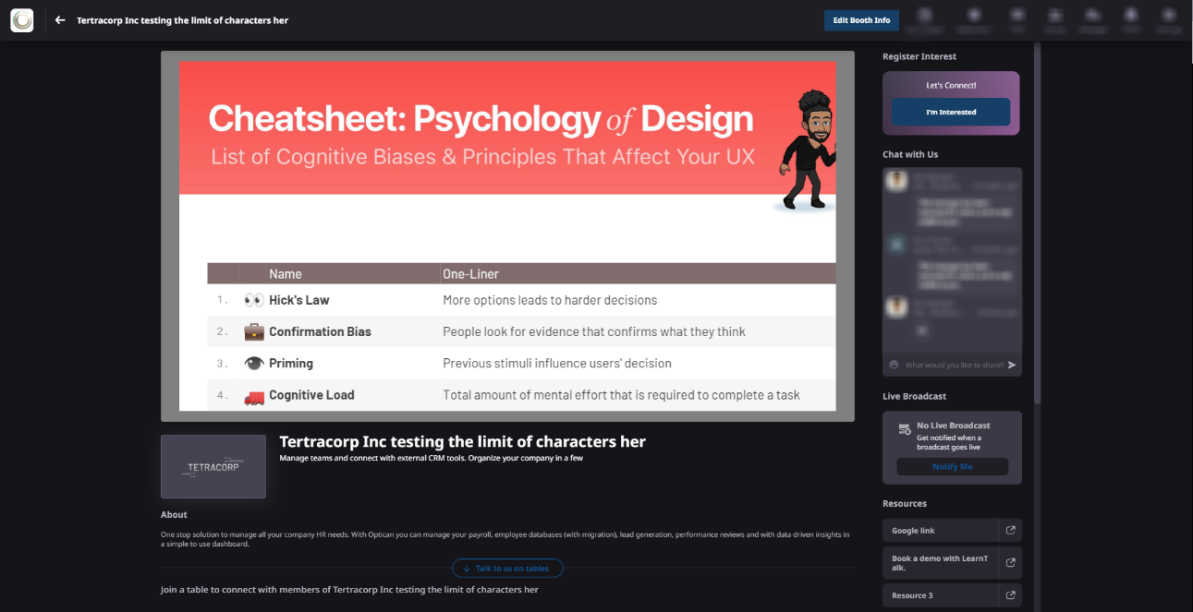
5. Poster Layout
Showcase a multi-page PDF document to your booth visitors, along with all other features.
To upload a PDF document to your booth, kindly follow the steps:
Step 1: Click on "Edit booth", then click on Layout, and select "Posters" layout.
Step 2: Upload the PDF Document from your computer.
Maximum supported File size: 200 MB
Recommended Aspect ratio: 16:9

Do not forget to "SAVE" your information.
The uploaded PDF will be shown in the screenshot below.
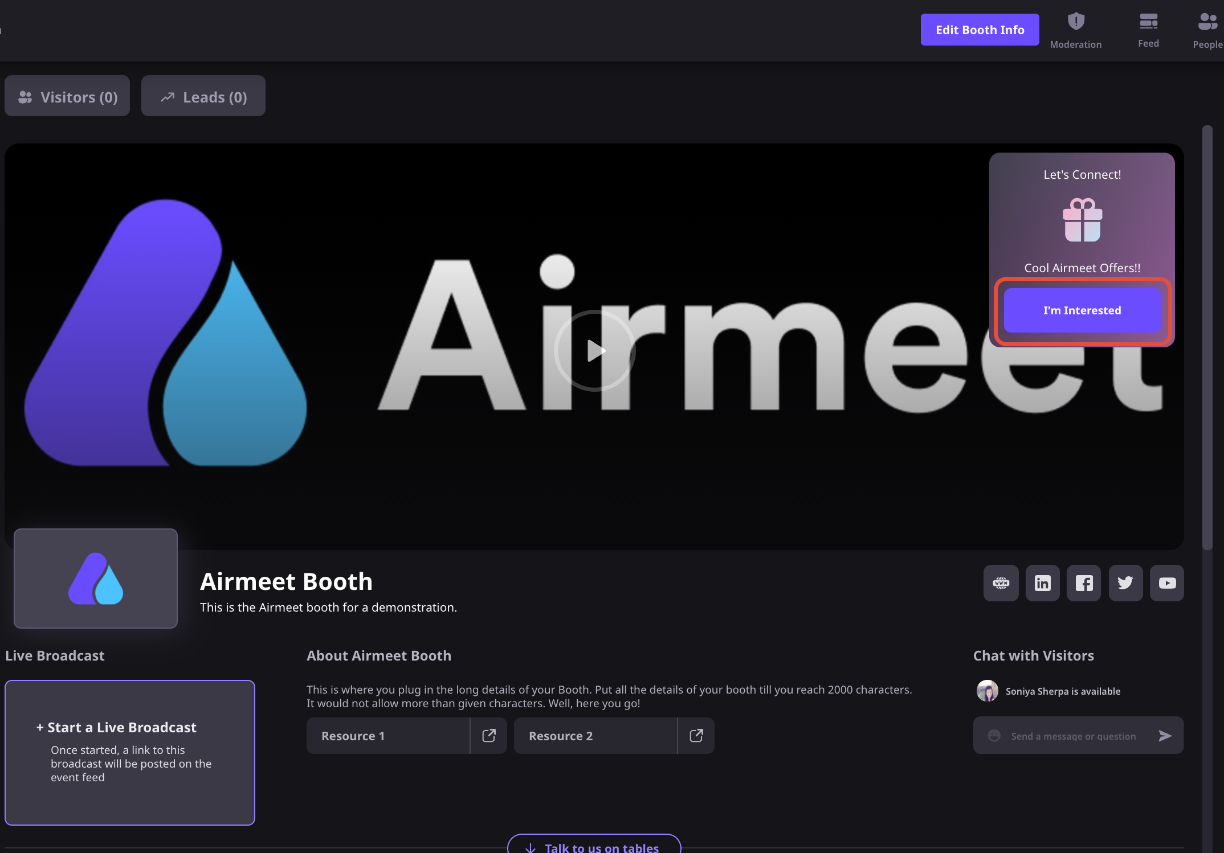
6. I'm Interested (Lead Generation)
The "I'm Interested" button is used to lead sales generations. Once the prospects click on it, the information is stored about the same and shared with the event organizer after the event has ended.
The host can then send those prospects' information to the exhibitors.
Related Articles :What happens when visitors click on the “I'm Interested” button on Airmeet Booths?
How to add exciting offers or discount coupons to your booth?
7. Booth Tables
Booth tables are similar to the social lounge, the attendees can converse and have video chats with the exhibitors. These tables can also be customized using exhibition logos & text to make them more informative.
a. Number of tables
Choose the number of tables required for this booth. A maximum of 12 tables are allowed. A maximum of 125 people can join each table.

b. Edit table
Update this table's details
Table topic: Choose a topic that participants will find interesting to join during the event.
Add image : You can add an image to the table which draws people to join. Supported image formats are: SVG, PNG or JPEG. Maximum file size 500 KB.
Number of seats : The table will have 8 fixed seats. If the table is full, a seat will be added if an Organizer or Booth Exhibitor tries to join.
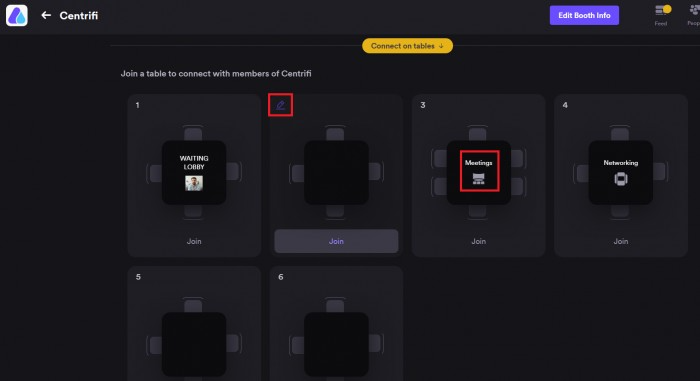
Table logo Dimensions: 144px*56px
Step 3: The organizer can set up their booth in a preview state, and once everything looks good, they can start the event.
Note: Not applicable in the case of booth exhibitors. The booth exhibitors have to join through the booth edit invitation link provided in the email.
Do not forget to save the edited information by clicking on the "Save Booth" button on the top-right side of the page.
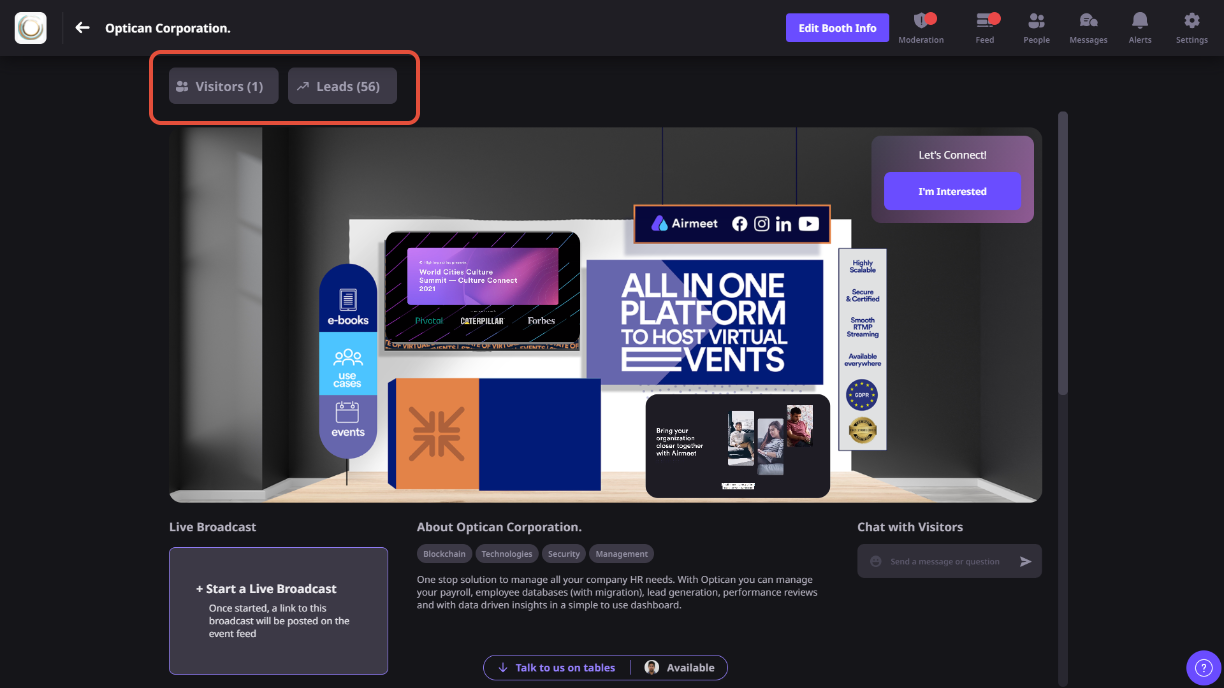
8. Booth Visitors and Leads Panel
The Booth Exhibitors can now see the real-time booth visitors and the Lead at the top left corner of their respective Booths. The visitor and lead will be shown in numbers.
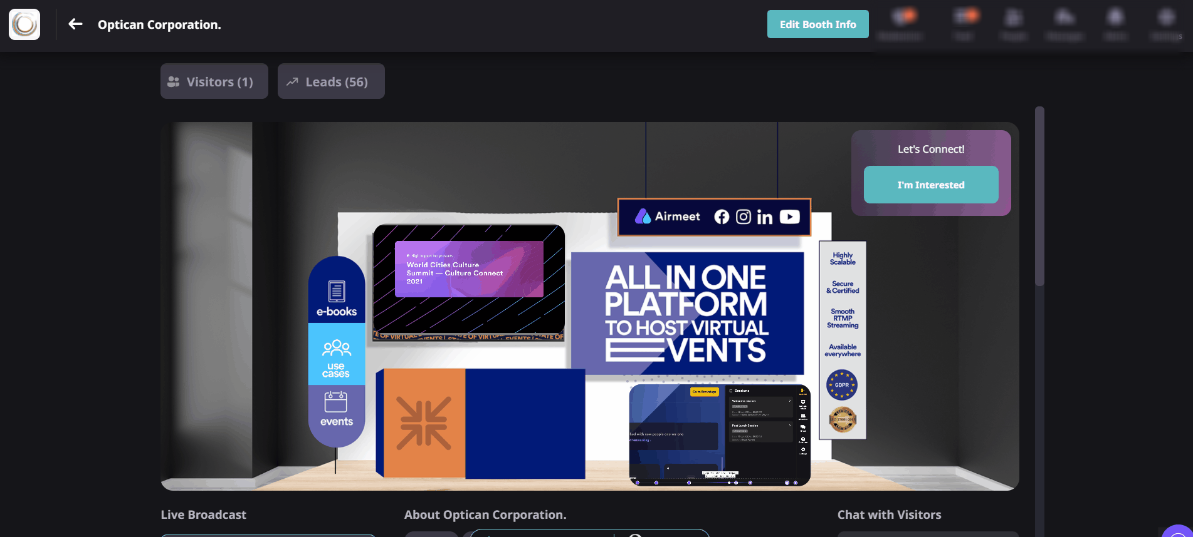
Visitors: The number of attendees who visit the booth to check out the product and services and are at the booth at the current moment.
Lead: The number of participants interested in the exhibition and clicked on the "I'm Interested" button on a particular booth.
Tip: Exhibitors can also send a direct message to the people interested in your exhibition by clicking on the message icon beside their names when clicking on the "Visitors" or "Leads."

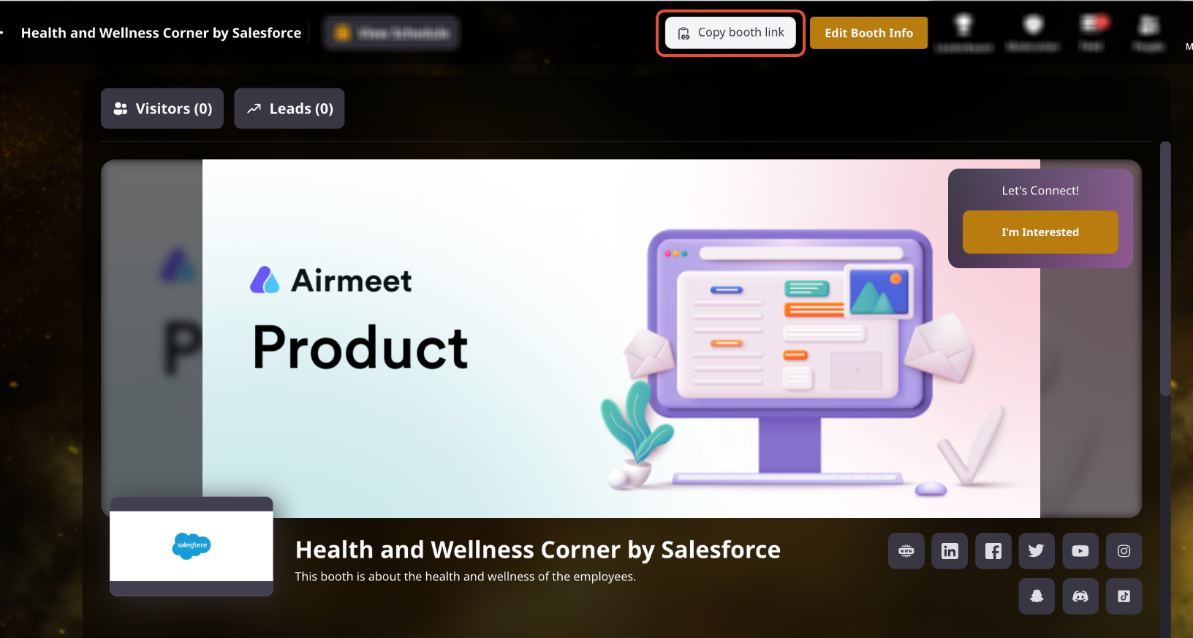
9. Sharing Booth Link
Exhibitors at the booth now can share booth links with event participants in order to enhance engagement. To copy the booth link, locate the "Copy booth link" button located at the top of the booth.
Related Articles:
How to set up a "Custom Booth" in an Airmeet event?
Branding Guide - Virtual Event Format